
How to
Repair PST File: Avoid ScanPST
T files are crucial for storing Outlook email data, but they often face corruption due to factors like file size, hardware issues, or malware attacks. While the built-in tool, Scanpst, helps repair these files, many users seek alternative methods. In this article, we’ll explore various solutions for repairing PST files without relying on Scanpst.
Now Repair PST File Without ScanPST
Once you’ve selected the PST file(s), you’ll encounter various additional options within the same window if your PST file contains encrypted emails, mainly if you’ve employed SMIME or OpenPGP encryption methods to safeguard crucial and confidential data; fret not. Our application offers a “Remove Encryption” feature. With this, you can decrypt these emails in bulk, provided you have the necessary encryption certificate, private key, and encryption password, thereby facilitating efficient PST file repair.
Furthermore, the application presents two scan modes, Quick and Advanced, tailored to address corruption levels effectively. If the Inbox Repair Tool falls short of resolving your issues, opting for the Advanced mode is advisable.
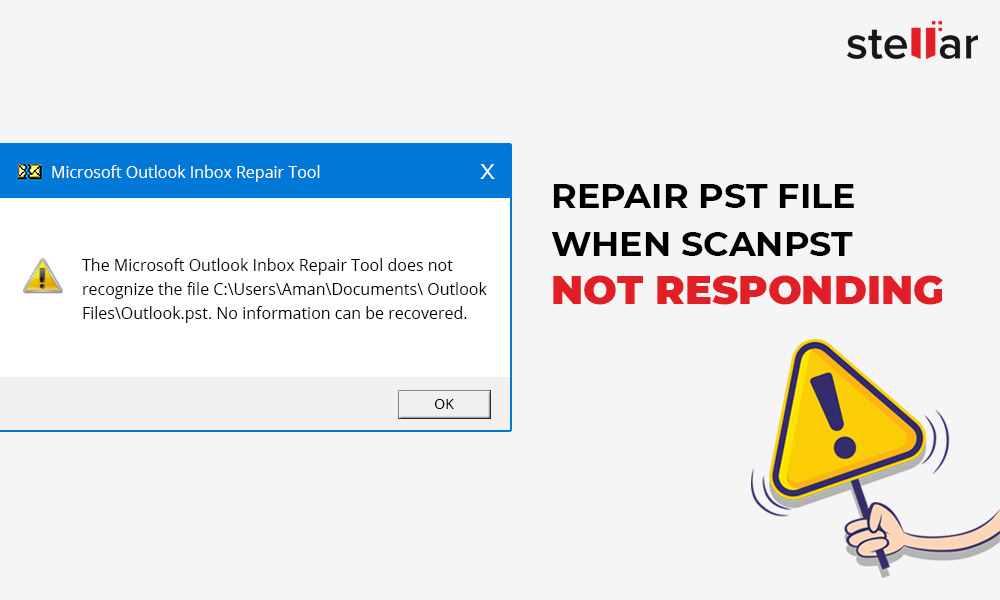
What To Do When ScanPST Does Not Work
ScanPST.exe fails to rectify an inaccessible PST file, so seeking an alternative solution becomes imperative. Despite its utility in addressing header section issues, ScanPST.exe presents limitations that may prove inconvenient. Users often encounter messages indicating its inability to resolve PST file issues. If you’ve explored ScanPST.exe, you’re likely aware of its constraints.
Causes of ScanPST Failing to Repair Outlook Data Files
The reasons behind ScanPST’s failure to repair Outlook data files are crucial before delving into potential solutions. Some common causes include:
- Severe Data File Corruption: ScanPST.exe may struggle to repair Outlook data files when severely corrupted. Users may encounter error messages indicating that the file is too damaged to be fixed.
- Incorrect File Path: ScanPST.exe may fail to repair Outlook data files if users provide an incorrect file path. This can occur when the data file is relocated or if the path is altered for any reason.
- Compatibility Issues with Outlook Version: ScanPST.exe might not successfully repair Outlook data files if there are compatibility issues with the version of Outlook being used. For instance, attempting to repair an Outlook 2007 data file with Outlook 2013 could lead to ScanPST.exe malfunctioning.
Download ScanPST.exe Alternative For Windows – Free
Once you’ve downloaded the software onto your Windows system, proceed to install and launch it. Upon opening the utility, locate the “Add File” option situated at the top left corner of the software window. From there, you can effortlessly add your damaged PST file or files.
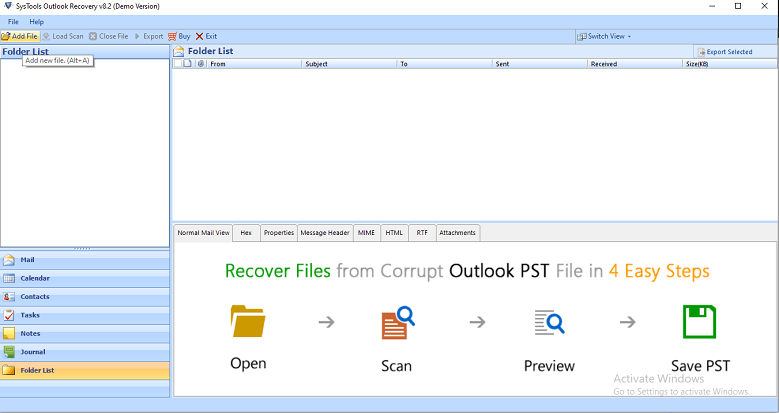
It’s worth noting that this application enables the repair of multiple PST files simultaneously, regardless of their size, and even operates without requiring Microsoft Outlook to be installed on your system. Additionally, you’ll discover various advanced features as you navigate through the tool.
Some Useful Tips to Prevent PST File Corruption
- Maintain Regular Backups: Safeguard your Outlook data by routinely backing up emails, contacts, attachments, and other essential information to a local PST file using the Outlook import/export wizard. Regular backups provide an additional layer of protection against data loss in the event of PST file corruption or unforeseen circumstances.
- Perform Periodic Scans: Regularly scan your Outlook data files, including PST files, to detect and address minor errors and inconsistencies. Conducting periodic scans helps identify potential issues early on, minimizing the risk of file corruption and ensuring smooth Outlook performance. Utilize built-in tools or third-party software to perform thorough scans and maintain the integrity of your Outlook data.
By proactively implementing these preventive measures, you can reduce the likelihood of PST file corruption and enhance the overall reliability and stability of your Outlook environment.
How to Repair OST File Outlook 365
OST files, also known as Outlook Data Files, store data associated with Exchange accounts. Repairing OST files in Outlook 365 follows a similar process to that of PST files. Please refer to the sections above: “How to Repair PST File Without ScanPST” and “How to Repair PST File Using ScanPST” for detailed instructions.

Alternatively, you can utilize the Repairit for Email tool:
- Download and install Repairit for Email. Open the application and select “Select Files.”
- Click on “Find” to locate and upload the OST file. Then, click on “Repair” at the bottom.
- Once the repair process is complete, click on the “Save” button.
Best Free OST Repair Tools
OST files play a crucial role in Outlook by allowing access to essential data offline without relying on a network connection. When these files become damaged or corrupted, it’s necessary to repair them promptly. Here are some of the best tools available:
- KDE Tools OST Recovery Tool: This tool excels in recovering all types of corrupted or damaged OST files, even those that are password protected. It ensures compatibility across various systems, eliminating compatibility concerns.
- SysTools OST Recovery: Packed with advanced features, this tool efficiently fixes corrupt OST files, including those of large sizes. It ensures speedy recovery even for extensive data files.
- Kernel OST Recovery Tool: Offering comprehensive data retrieval capabilities, this tool supports recovery of various file types and enables saving them in different formats for compatibility across devices. Additionally, it can recover deleted items, enhancing its utility.
Top 3 Online PST Repair Tools
Here are the top three online PST repair tools renowned for their proficiency in maintaining Outlook data integrity:
- Aryson Outlook PST Repair: Specifically engineered to address corrupted and damaged PST files, Aryson’s tool excels in recovering emails, contacts, calendars, and various other Outlook elements.
- Voimakas Outlook PST Recovery: Known for its remarkable speed and effectiveness, the Voimakas tool ensures swift recovery of PST files without compromising data quality.
- Recovery Toolbox for Outlook: This versatile tool caters to both PST and OST file repairs, making it invaluable for personal and business use. It facilitates the recovery of emails, attachments, and other essential Outlook data with ease.
Apply Advanced Feature and Repair PST File
- Upon successful repair of the PST file, the left panel will showcase all folders, with those containing data highlighted in bold font for easy identification.
- Recovered deleted items, such as emails, contacts, calendars, tasks, notes, and journals, are previewed in red color, facilitating quick recognition.
- The Sorted Data Item List is conveniently accessible below, allowing separate viewing of emails, contacts, calendars, tasks, notes, and journals.
- Within the main preview window of each selected item, numerous options are available. For instance, in the Mails section, a comprehensive list of emails within the selected folder is provided. Users can efficiently filter and sort displayed email messages using various criteria, including Subject, To, Cc, BCC, Sent/Received Date, Time, Size (KB), Path, Priority, and more.
- Furthermore, users can view a single email message in seven different formats: Normal Mail View, Hex, Properties, MIME, Message Header, HTML, and RTF. Attachment preview is also supported, either through the Attachment preview option or by double-clicking the attachment, which opens in a new preview window.
- Similar options for sorting and previewing are available for contacts, calendars, tasks, notes, and journals, providing users with comprehensive control and convenience. Attachments in calendars, tasks, and journals can also be previewed directly within the preview panel.
Frequently Asked Questions
What is a PST file?
A PST (Personal Storage Table) file is a data file used by Microsoft Outlook to store email messages, contacts, calendar events, tasks, and other items. It serves as a local repository for Outlook data, allowing users to access their emails and other information even when offline.
Why do PST files get corrupted?
PST files can become corrupted due to various reasons, including sudden system shutdowns, Outlook crashes, hardware failures, software conflicts, malware infections, and exceeding size limits. Corruption can lead to the loss of emails, contacts, and other valuable data stored within the PST file.
What is ScanPST?
ScanPST, also known as the Inbox Repair Tool, is a utility provided by Microsoft to repair corrupted or damaged PST files in Outlook. It scans the structure of the PST file, identifies inconsistencies or errors, and attempts to fix them to restore access to your Outlook data.
When should I use ScanPST?
It would help if you used ScanPST when you encountered issues accessing your Outlook data, such as error messages indicating corruption or damage to the PST file. ScanPST is the first step in troubleshooting PST file problems and is often effective in repairing minor issues.
Are there alternatives to ScanPST for repairing PST files?
Yes, there are alternative methods for repairing PST files, including third-party PST repair tools, splitting large PST files, using Outlook’s import feature, recovering deleted items, converting OST files to PST, and seeking professional assistance for complex issues.
How do third-party PST repair tools differ from ScanPST?
Third-party PST repair tools often offer advanced features beyond what ScanPST provides, such as selective item recovery, batch processing, support for severely damaged files, and user-friendly interfaces. These tools can be more effective in repairing PST files with complex or severe corruption issues.
Can I prevent PST file corruption?
While it’s not always possible to prevent PST file corruption entirely, you can take measures to minimize the risk, such as regularly backing up your PST files, avoiding abrupt system shutdowns, keeping Outlook and your operating system up to date, and using reliable antivirus software to protect against malware infections.
What should I do if ScanPST fails to repair my PST file?
Suppose ScanPST fails to repair your PST file. In that case, you can try alternative methods such as using third-party repair tools, splitting large PST files, recovering deleted items, converting OST files to PST, or seeking professional assistance from data recovery specialists. Each method has its advantages and suitability depending on the specific circumstances of your PST file issue.
Conclusion
PST files are vital components of Microsoft Outlook, serving as repositories for emails, contacts, calendars, and more. However, these files are susceptible to corruption due to various factors such as system crashes, malware, or exceeding size limits. While ScanPST is a helpful tool provided by Microsoft for repairing PST files, more is needed, especially in cases of severe corruption.
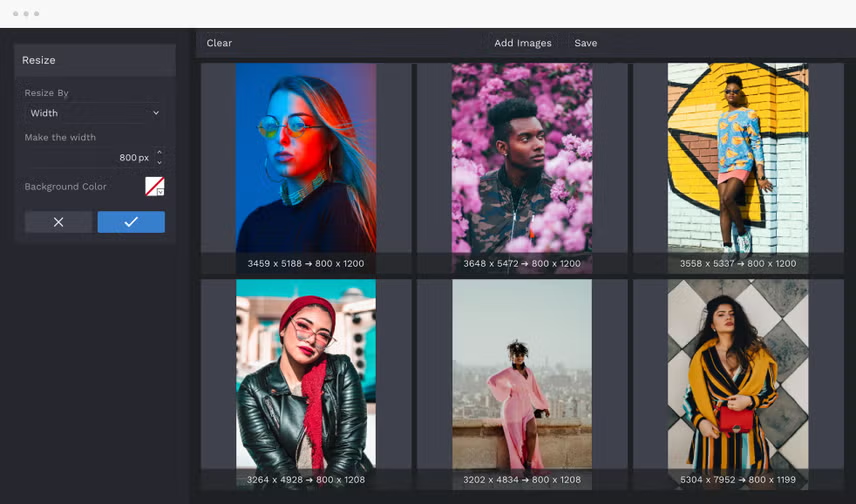
Resizing photos on your Android device can be a useful skill to have, whether you want to save storage space, share images more efficiently, or meet specific size requirements for uploading to social media or websites. In this comprehensive guide, we’ll explore various methods and tools available for resizing photos on Android devices, from built-in features to third-party apps. Whether you’re a novice or a seasoned Android user, you’ll find step-by-step instructions and tips to help you resize your photos effortlessly.
Introduction to Resize Photo
Learn to resize photos on your Android device effortlessly. Access your gallery, select the image, and open it for editing. Look for the resize option, where you can adjust dimensions and maintain the aspect ratio if needed. Confirm your changes and save the resized photo. It’s a simple process that allows you to tailor images to your specifications with ease. Perfect for sharing, uploading, or optimizing storage space on your device.
Understanding Photo Resolution and Size
Before diving into resizing methods, it’s essential to understand the concepts of photo resolution and size. Resolution refers to the amount of detail in an image, typically measured in pixels per inch (PPI) or dots per inch (DPI). Size, on the other hand, refers to the dimensions of an image, usually expressed in pixels (e.g., 1920×1080). Resizing a photo involves adjusting its dimensions while potentially altering its resolution and file size.
Built-in Tools for Resizing Photos
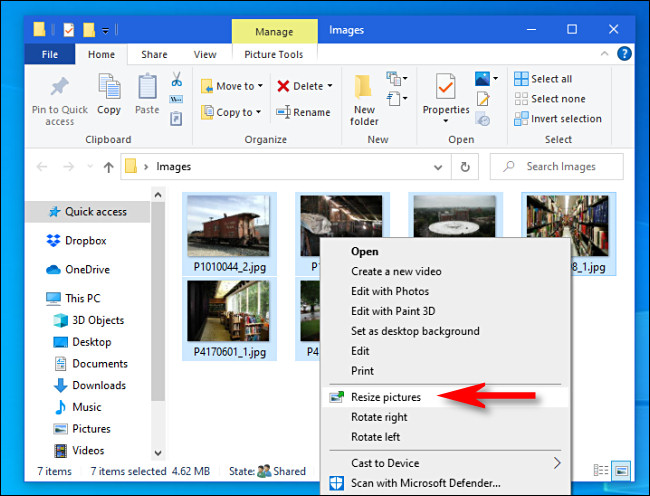
Many Android devices come with built-in tools or features for editing photos, including resizing options. These tools are often found within the default gallery or photo management app. We’ll explore how to access and use these built-in tools to resize photos directly on your Android device without the need for additional apps.
Using Third-Party Photo Editing Apps
While built-in tools are convenient, they may lack advanced features or customization options for resizing photos. Third-party photo editing apps offer a wide range of tools and effects, including precise resizing capabilities. We’ll introduce popular photo editing apps available on the Google Play Store and demonstrate how to use them to resize photos effectively.
Batch Resizing Multiple Photos
If you need to resize multiple photos simultaneously, manually editing each one can be time-consuming. Batch resizing allows you to resize multiple photos at once, saving you time and effort. We’ll discuss how to batch-resize photos using both built-in tools and third-party apps, streamlining the process of handling large photo collections.
Maintaining Photo Quality During Resizing
Resizing a photo can sometimes result in a loss of image quality, particularly if you’re reducing its size significantly. However, there are techniques and settings you can adjust to minimize quality loss during resizing. We’ll provide tips and best practices for maintaining optimal photo quality while resizing images on your Android device.
Resizing Photos for Specific Purposes
Different scenarios may require photos to meet specific size requirements, such as social media profile pictures, website banners, or printing purposes. We’ll explore how to resize photos to fit these various purposes, including recommended dimensions and aspect ratios for common use cases.

Resizing Photos Without Losing Exif Data
Exif (Exchangeable Image File Format) data contains valuable information about a photo, including camera settings, date and time of capture, and geolocation. When resizing photos, it’s essential to preserve this metadata whenever possible. We’ll discuss methods for resizing photos without losing Exif data, ensuring that valuable information remains intact.
Sharing Resized Photos
Resize your photos to the desired dimensions, you’ll likely want to share them with others or use them in various contexts. We’ll cover different methods for sharing resized photos, including email, messaging apps, cloud storage services, and social media platforms.
Automating Photo Resizing Tasks
Resize photos for specific purposes, automating the process can save you even more time. We’ll explore automation tools and scripts that allow you to resize photos automatically based on predefined settings or criteria, making photo management more efficient.

Troubleshooting Common Issues
Despite following the resizing instructions, you may encounter common issues or challenges along the way. From unexpected changes in photo quality to compatibility issues with certain apps, we’ll address common troubleshooting scenarios and provide solutions to help you overcome them effectively.
Frequently Asked Questions
How do I resize a photo on Android?
You can resize a photo on Android using built-in tools in the gallery app or by using third-party photo editing apps available on the Google Play Store.
Can I resize multiple photos at once on Android?
Yes, you can resize multiple photos simultaneously using batch resizing features available in some gallery apps or third-party photo editing apps.
Will resizing a photo reduce its quality?
Resizing a photo can potentially reduce its quality, especially if you’re decreasing its dimensions significantly. However, you can minimize quality loss by using appropriate resizing techniques and settings.
What are the recommended dimensions for resizing photos for social media?
Each social media platform has its own recommended dimensions for profile pictures, cover photos, and post images. Refer to the platform’s guidelines for the most up-to-date recommendations.
How can I resize a photo without losing its Exif data?
Some photo editing apps offer options to preserve Exif data during the resizing process. Look for these features when selecting an app for resizing photos on Android.
Are there any free apps for resizing photos on Android?
Yes, many free photo editing apps on the Google Play Store offer resizing features. Explore options like Snapseed, Adobe Photoshop Express, or Pixlr for resizing photos at no cost.
Can I resize photos offline on Android?
Yes, you can resize photos offline using built-in tools in the gallery app or by downloading third-party photo editing apps that offer offline functionality.
How can I ensure that resized photos maintain their aspect ratio?
Most photo editing apps allow you to maintain the aspect ratio of a photo while resizing by locking the aspect ratio or selecting a predefined aspect ratio option.
Will resizing a photo affect its file format?
Resizing a photo typically doesn’t change its file format. However, some advanced editing features in certain apps may allow you to convert the file format during the resizing process.
Can I undo changes after resizing a photo?
Many photo editing apps include an undo feature that allows you to revert changes, including resizing if you’re not satisfied with the results. Look for the undo button or gesture within the app’s interface.
Conclusion
Resizing photos on Android devices offers a versatile solution for various purposes, from conserving storage space to meeting specific size requirements for social media, websites, or printing. Throughout this guide, we’ve explored different methods and tools available for resizing photos on Android, including built-in features in gallery apps and third-party photo editing apps from the Google Play Store.
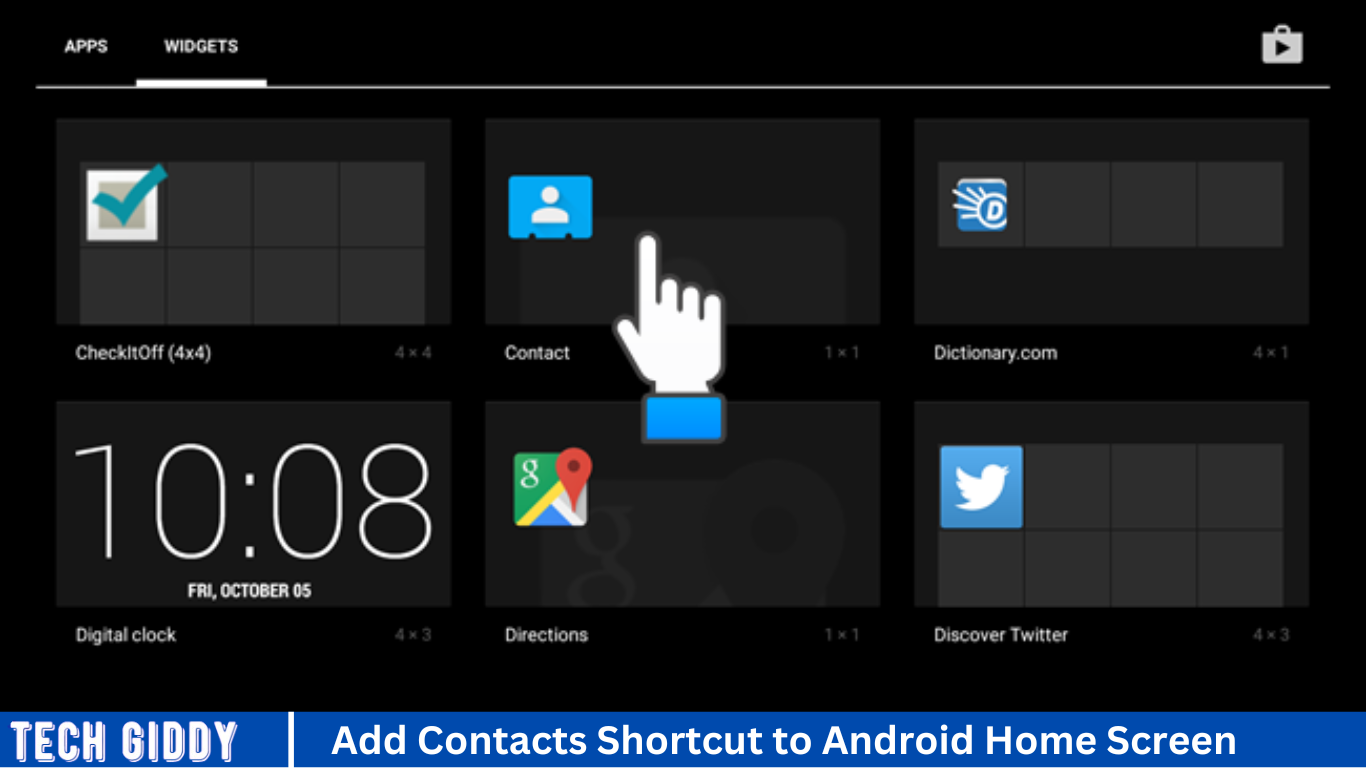
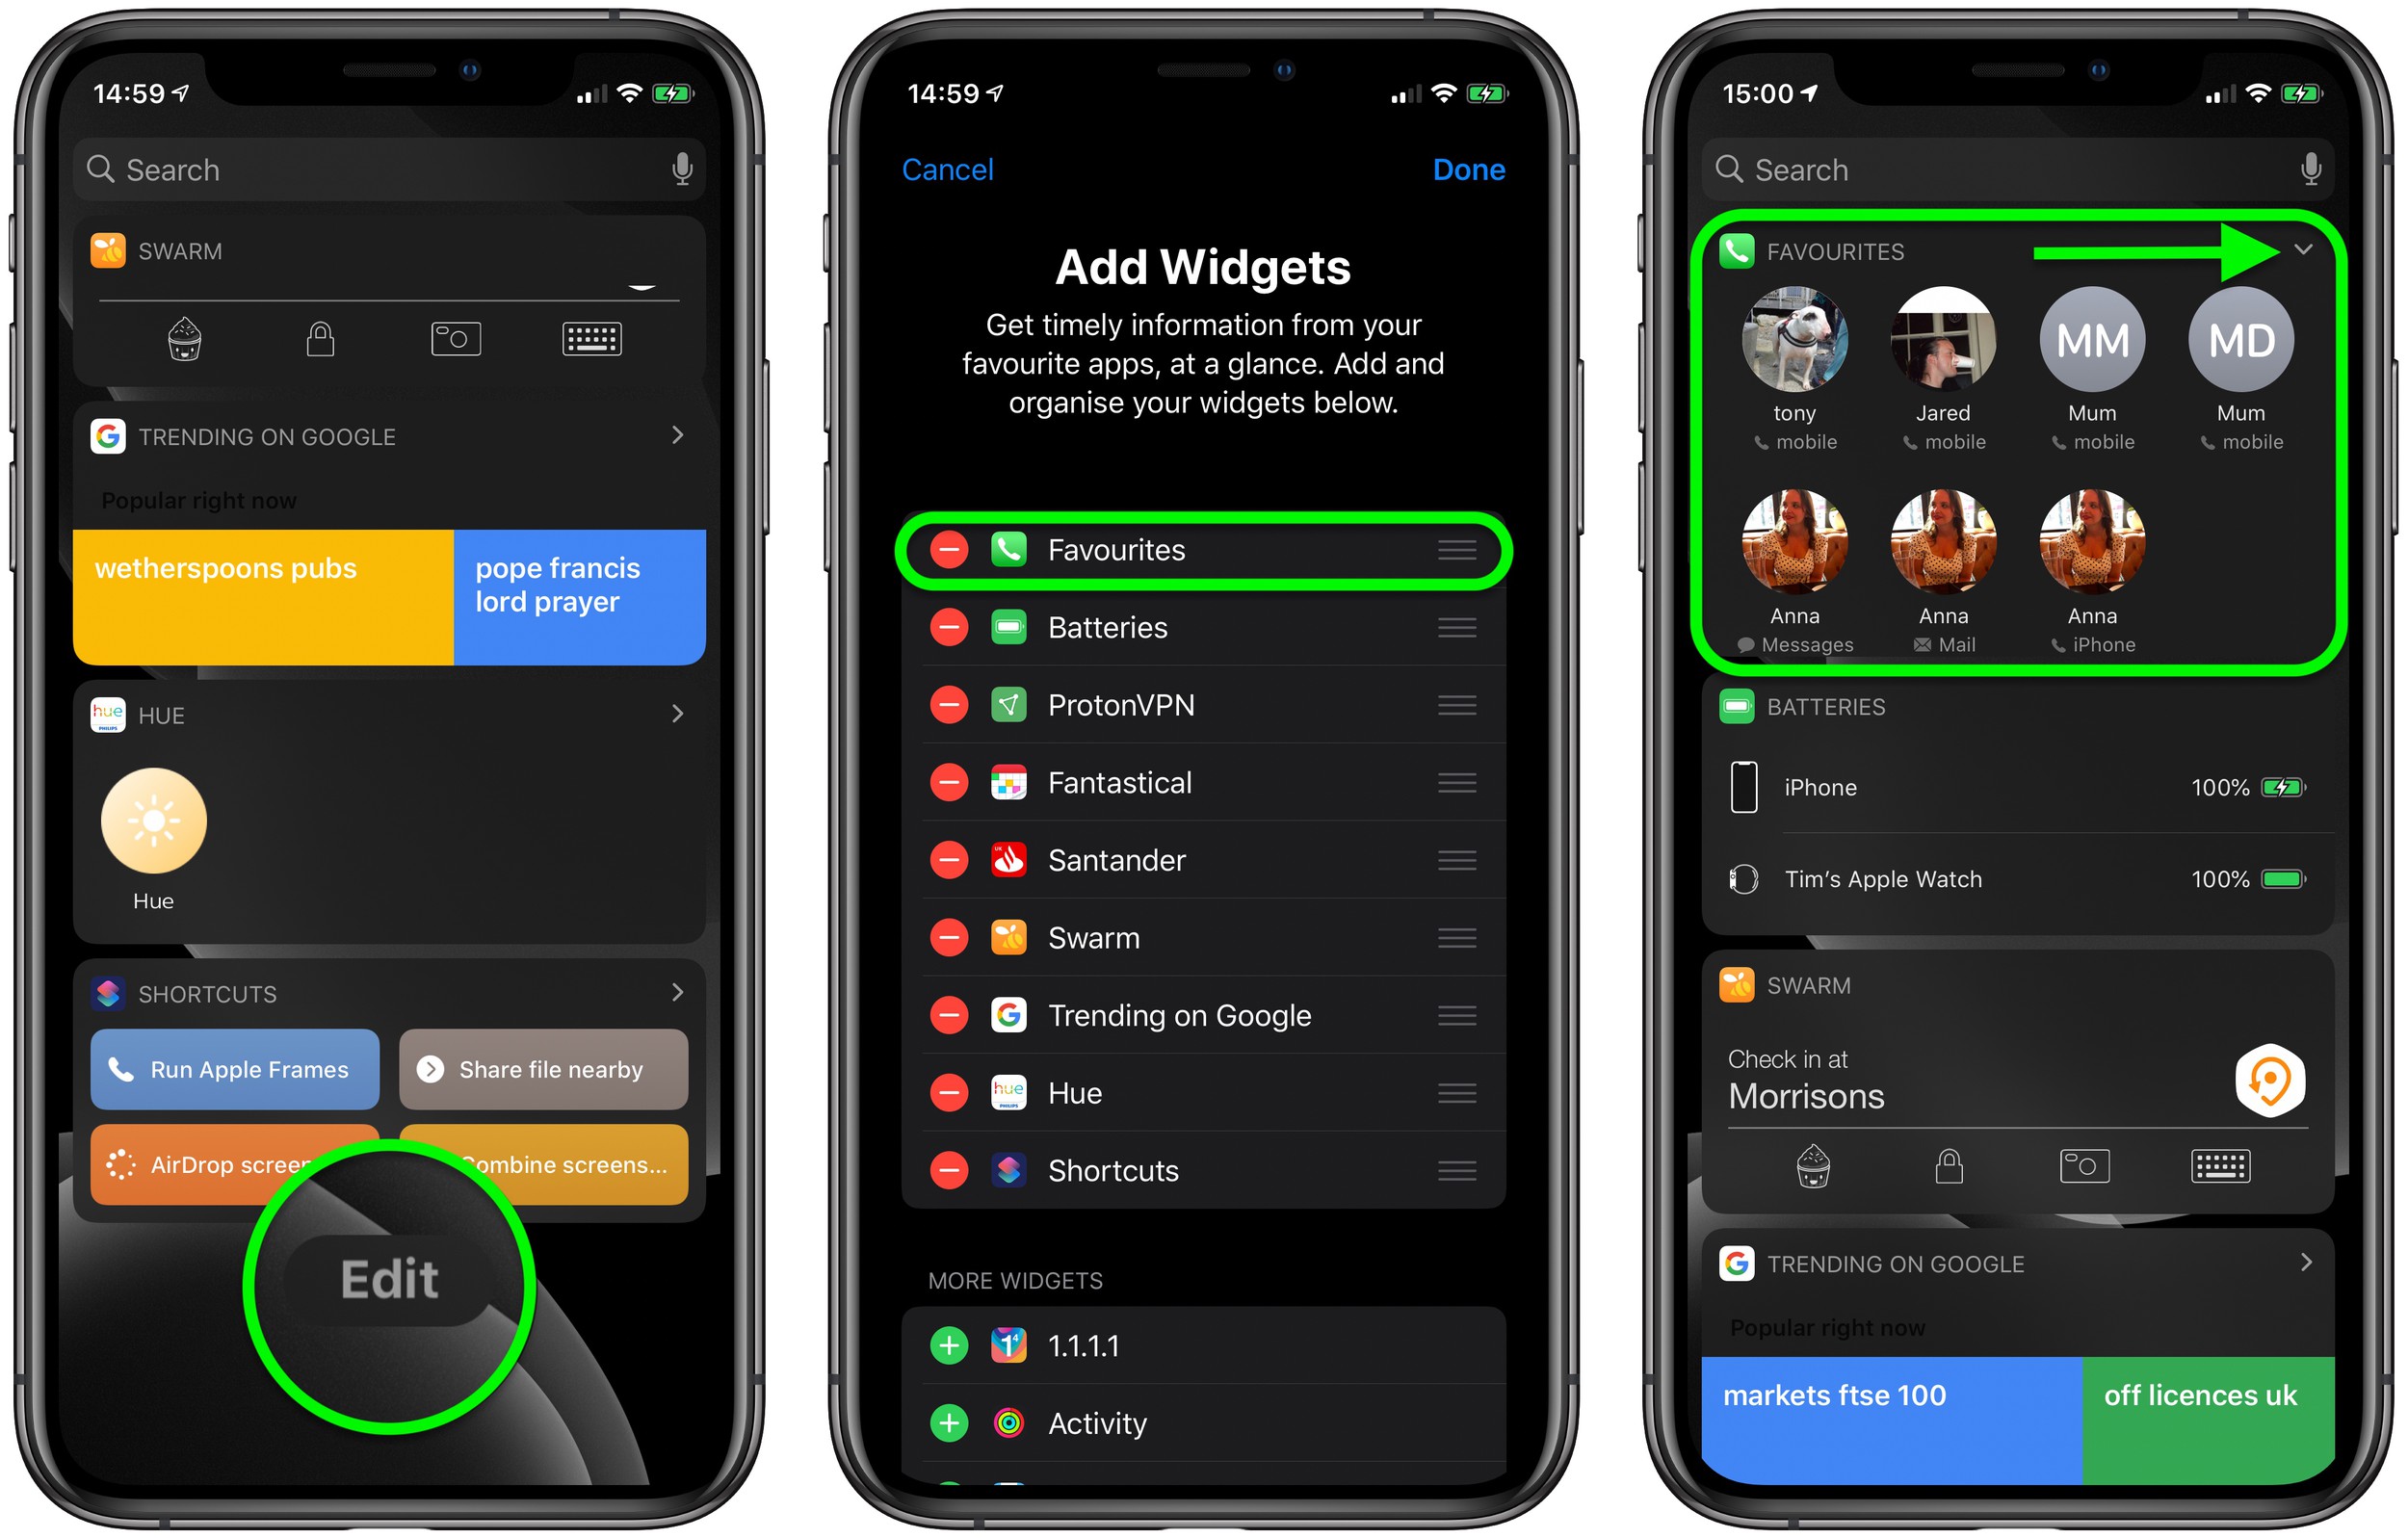
Add a contacts shortcut to your Android home screen, navigate to your contacts app, find the contact you want to add, tap and hold on their name until a menu appears, then select “Add to Home screen” or “Create shortcut.” The contact shortcut will then appear on your home screen, allowing you to quickly access and call or message that contact with a single tap.
Introduction to Contacts Shortcut to Android Home Screen
Your Android device offers a multitude of features to enhance productivity and convenience, including the ability to add shortcuts to frequently accessed contacts directly to your home screen. This guide provides a step-by-step walkthrough to help you effortlessly create and customize contact shortcuts on your Android device, ensuring quick and easy access to your most important contacts.
Understanding Contacts Shortcuts
Contacts shortcuts are convenient links that allow you to directly call, message, or email a specific contact without navigating through your contacts list or dialer app. By adding these shortcuts to your home screen, you can streamline communication and save valuable time accessing your favorite contacts.
Accessing Contacts on Android
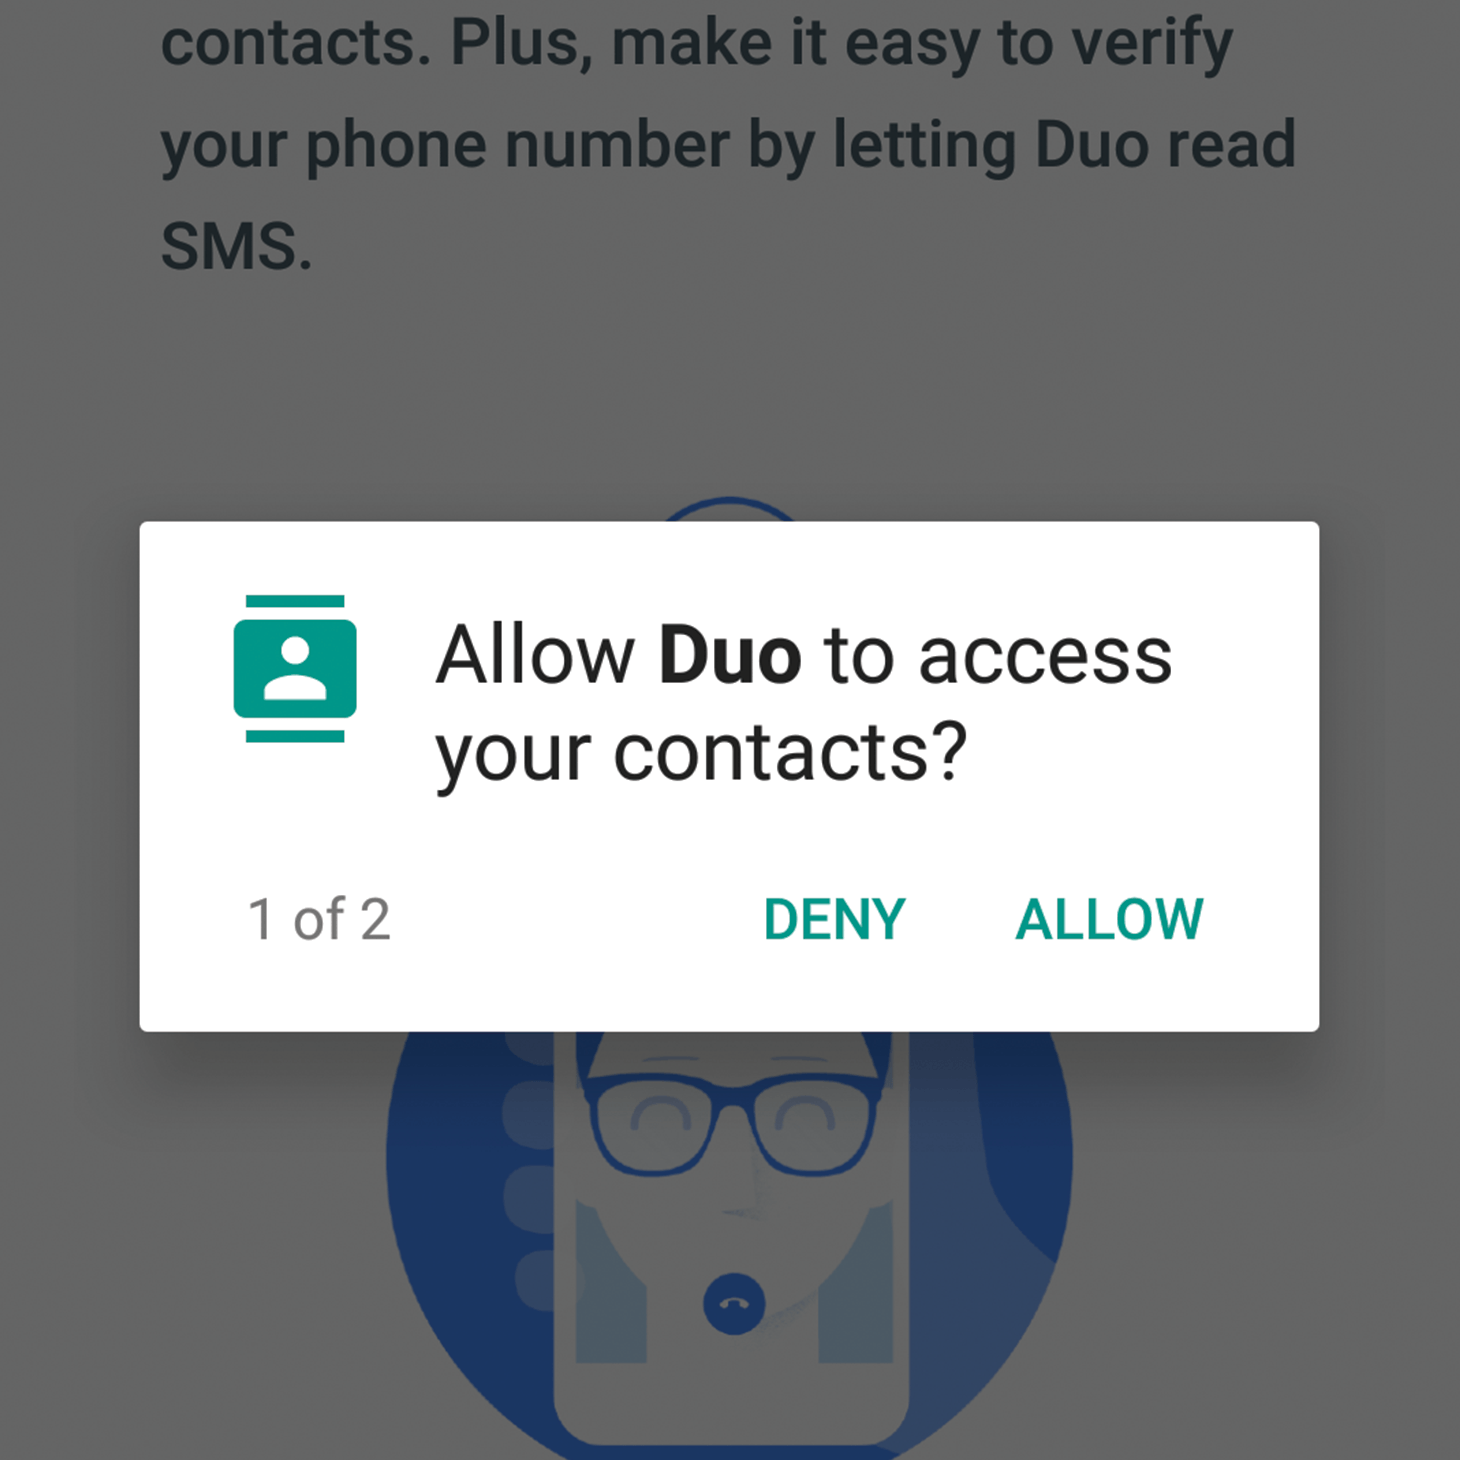
Before adding contact shortcuts to your home screen, it’s essential to familiarize yourself with accessing and managing contacts on your Android device. Typically, contacts are stored in the Contacts or People app, where you can view, edit, and organize your contacts list. Additionally, many Android devices offer integration with cloud services like Google Contacts, ensuring seamless synchronization across devices.
Creating Contacts Shortcuts
To add a contacts shortcut to your Android home screen, follow these simple steps:
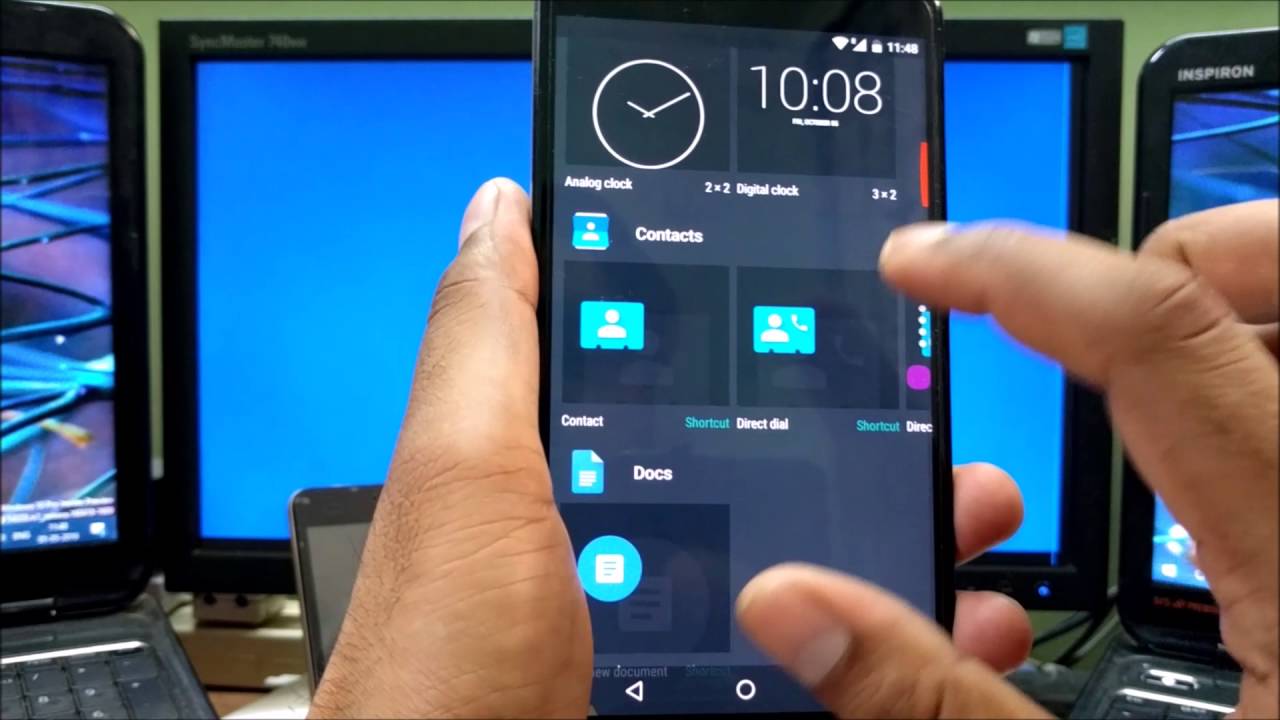
- Open the Contacts or People app on your Android device.
- Locate the contact you want to add to your home screen.
- Long-press on the contact’s name or profile picture to select it.
- A menu will appear with various options. Select “Add to Home screen” or “Create shortcut,” depending on your device’s interface.
- Follow the prompts to customize the shortcut’s name and icon if desired.
- Once configured, tap “Add” or “Done” to add the shortcut to your home screen.
Customizing Contacts Shortcuts
Android offers flexibility in customizing contact shortcuts to suit your preferences and workflow. Here are some customization options you can explore:
- Rename the Shortcut: Edit the shortcut’s name to make it more descriptive or recognizable.
- Choose an Icon: Select a custom icon for the shortcut to differentiate it from other icons on your home screen.
- Add Multiple Shortcuts: You can create shortcuts for multiple contacts and organize them into groups or folders on your home screen.
- Resize and Rearrange: Android home screens typically allow you to resize and rearrange shortcuts, giving you full control over their placement and appearance.
Managing Contacts Shortcuts
Here are some tips for managing contacts shortcuts on Android:
- Deleting Shortcuts: To remove a contacts shortcut from your home screen, long-press on the shortcut until a menu appears, then select “Remove” or “Delete.”
- Updating Shortcuts: If a contact’s information changes, you can update the corresponding shortcut by editing it from the Contacts or People app.
- Organizing Shortcuts: Organize contacts shortcuts into folders or groups on your home screen to streamline access and declutter your interface.
- Backing Up Contacts: Regularly backup your contacts to ensure you don’t lose any important information, especially if you rely heavily on contacts shortcuts for communication.
Best Practices for Using Contact Shortcuts
To make the most of contacts shortcuts on your Android device, consider the following best practices:
- Prioritize Frequently Used Contacts: Add shortcuts for contacts you communicate with regularly to maximize efficiency.
- Keep Shortcuts Organized: Organize contacts shortcuts logically to avoid cluttering your home screen and ensure easy access.
- Update Contact Information: Periodically review and update contact information to ensure accuracy and relevance.
- Backup Contacts Regularly: Backup your contacts regularly to prevent data loss and ensure seamless synchronization across devices.
Frequently Asked Questions
How do I add a contacts shortcut to my Android home screen?
To add a contacts shortcut, long-press on an empty area of your home screen, select “Widgets,” scroll through the widgets to find the Contacts or Direct Dial widget, then drag it to your home screen and select the contact you want to add.
Can I create shortcuts for specific contacts on Android?
Yes, Android allows you to create shortcuts for specific contacts, making it convenient to call or message them directly from your home screen.
What steps do I follow to add a contact to my home screen?
Long-press on a space on your home screen, select “Widgets,” find the Contacts or Direct Dial widget, drag it to your home screen, and then choose the contact you want to add.
Is it possible to customize the appearance of the contact shortcut?
Some Android launchers or widgets may allow for customization of the contact shortcut appearance, such as the size or style of the widget.
How many contacts shortcuts can I add to my home screen?
You can add multiple contact shortcuts to your home screen, limited only by the available space on your screen.
Can I remove a contacts shortcut from my home screen?
Yes, you can remove a contacts shortcut from your home screen by long-pressing on it and dragging it to the “Remove” or “Delete” option at the top or bottom of the screen, depending on your device.
Will adding a contacts shortcut affect my phone’s performance?
Adding contacts shortcuts should not significantly affect your phone’s performance, as they are lightweight widgets designed for quick access to contacts.
Does the contacts shortcut update automatically if the contact’s information changes?
The contacts shortcut should update automatically if the contact’s information changes, ensuring that you always have the most up-to-date information.
Can I rearrange the position of contact shortcuts on my home screen?
Yes, you can rearrange the position of contact shortcuts on your home screen by long-pressing them and dragging them to the desired location.
Are there alternative methods to quickly access contacts on Android?
Yes, besides adding contacts shortcuts to your home screen, you can also access your contacts through the Contacts app, the Phone app, or by using voice commands with Google Assistant.
Conclusion
Adding contact shortcuts to your Android home screen provides a convenient way to quickly access and communicate with specific contacts. By following simple steps, users can customize their home screen with direct dial or messaging shortcuts for their frequently contacted individuals. These shortcuts offer efficient communication and streamline the user experience without significantly impacting device performance.
Looping a YouTube video on an Android device is a straightforward process that can be achieved using various methods, including built-in YouTube features, third-party apps, or browser extensions. In this guide, we’ll explore different ways to loop a YouTube video on an Android device, step by step, providing detailed instructions for each method.
Introduction to Looping YouTube Videos on Android
YouTube videos on Android, first, open the YouTube app and select the video you want to loop. Then, tap the three dots icon next to the video and choose “Loop” from the menu. This will continuously repeat the video until you manually stop it. Alternatively, you can use third-party apps like “Loop YouTube Videos” from the Play Store, which offer additional customization options for looping videos.

Launch the YouTube App or Access the YouTube Website
YouTube on Android, launch the YouTube app from your device’s home screen or app drawer. Alternatively, open a web browser on your Android device and navigate to the YouTube website by typing “youtube.com” in the address bar. Once on the YouTube homepage, you can search for videos, browse recommended content, or access your subscriptions. Ensure you have a stable internet connection for smooth playback.
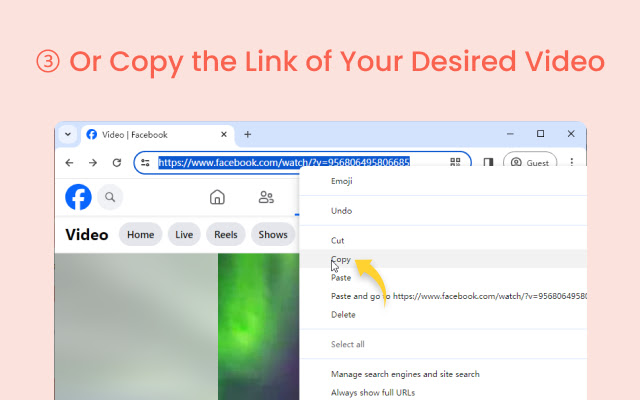
Search and Select the Desired Video
For specific videos on YouTube, open the YouTube app or website on your device. Then, use the search bar at the top of the screen to type in keywords related to the video you’re looking for. After entering your search query, scroll through the results and tap on the desired video to select it. The video will then start playing automatically for you to enjoy.
Open the Video Playback Controls
To access video playback controls on YouTube, simply tap on the video while it’s playing. This action will bring up the playback controls overlay, which includes options like play/pause, volume adjustment, timeline scrubbing, and fullscreen mode. You can also tap on the screen again to hide the controls. These controls provide convenient ways to manage your viewing experience and interact with the video content seamlessly.
Locate and Tap on the Loop Icon
Looping for a YouTube video, tap on the screen while the video is playing to reveal the playback controls. Next, locate the loop icon, typically represented by two curved arrows forming a circle. It’s usually situated among the playback control options. Tap on this loop icon to activate looping for the current video. Once enabled, the video will continuously repeat until you manually turn off the loop feature.
Adjust Loop Settings (if Available)
Loop settings are available, access them within the app or browser extension. Adjust loop preferences such as loop count or loop range if applicable. For example, you may specify whether the entire video or only a portion should loop. Confirm changes and proceed with playback to ensure the video loops are according to the configured settings for a tailored viewing experience.
Start Playback of the VideoVerify the Video is Looping Properly
After selecting the desired video on the YouTube app, start playback. If using a third-party looping app, initiate playback within the app interface. Ensure the video plays smoothly without interruptions. Verify looping functionality by observing the video replaying seamlessly once it reaches the end. If looping is not enabled, access the loop option again and ensure it is activated for continuous playback.
Frequently Asked Questions
How do I loop a YouTube video on my Android device?
Open the YouTube app, play the video you want to do, and tap the loop icon (two curved arrows forming a circle) among the playback controls.
Can I loop a video on the YouTube website using my Android device?
Yes, you can loop a video on the YouTube website using the loop icon just like in the app.
Are there any third-party apps for looping YouTube videos on Android?
Yes, there are third-party apps available on the Play Store like “Loop YouTube Videos” that offer looping functionality.
Can I adjust the loop settings on the YouTube app?
The YouTube app generally offers a basic loop feature. For more advanced loop settings, consider using third-party apps.
How do I turn off loop mode on the YouTube app?
Tap the loop icon again to disable loop mode while the video is playing.
Is it possible to loop only a specific portion of a YouTube video on Android?
Some third-party apps may offer this feature, allowing you to select a specific portion of the video to loop.
Will looping a YouTube video consume more data on my Android device?
Looping a video doesn’t increase data usage as the video is already loaded once.
Can I loop a playlist of videos on the YouTube app?
Currently, looping is only available for individual videos, not entire playlists.
Does looping a video affect my YouTube viewing history?
Looping a video doesn’t affect your viewing history on YouTube.
Are there any legal restrictions on looping YouTube videos?
Looping videos on YouTube is generally allowed as long as it complies with YouTube’s terms of service and copyright policies.
Conclusion
Looping YouTube videos on your Android device is a straightforward process using either the YouTube app or the website. You can access the loop feature directly from the playback controls, ensuring your favorite videos repeat seamlessly. While basic looping is available within the YouTube app, third-party apps offer additional customization options for looping preferences. Enjoy uninterrupted playback of your preferred content with ease on your Android device.

Buffalo Milk: Benefits and Nutritional Value
Resize Photo on Android
Add Contacts Shortcut to Android Home Screen
Loop a YouTube Video on Android Device
12 Ways to Transfer Photos from Phone to Laptop Without USB Cable

Unveiling the Mystery: What You Need to Know About 02045996879
1337x Proxy List: New Websites in 2024
KickassTorrents — New Websites in 2024 (100% Working)
How to Save Pinterest Videos on your Android Device
The Epitome of Elegance: Unveiling the Gold Apple Watch Series 9
-
 Entertainment5 months ago
Unveiling the Mystery: What You Need to Know About 02045996879
-
 Entertainment5 months ago
1337x Proxy List: New Websites in 2024
-
 Entertainment5 months ago
KickassTorrents — New Websites in 2024 (100% Working)
-
 How to4 months ago
How to Save Pinterest Videos on your Android Device
-
 Blog6 months ago
The Epitome of Elegance: Unveiling the Gold Apple Watch Series 9
-
 News4 months ago
Get a Free Government iPhone 13: Your Complete Guide
-
 How to4 months ago
Add Pronouns to Email Sig
-
 How to4 months ago
How to Restore Deleted Contacts on Android