
How to
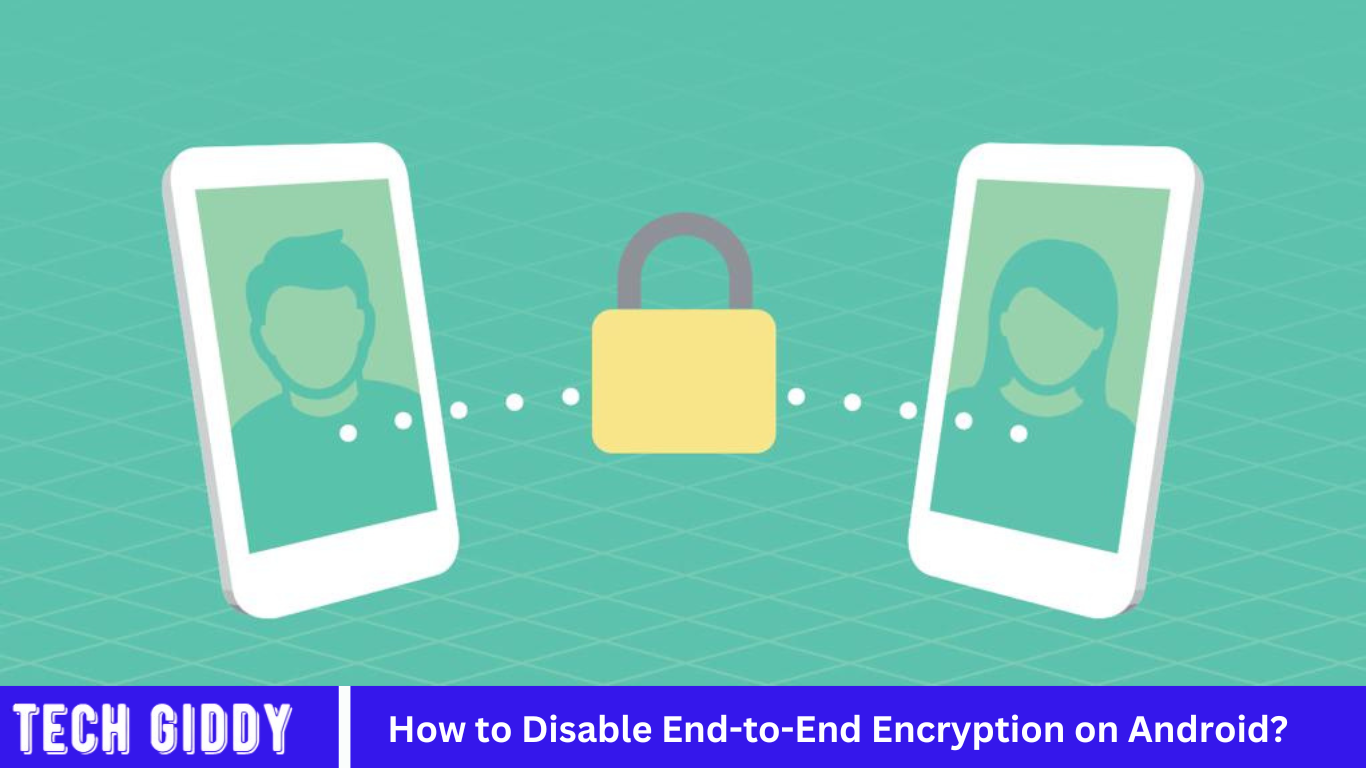
How to Disable End-to-End Encryption on Android?
Disable end-to-end encryption on an Android device, open your messaging app and navigate to the settings. From there, look for a section labeled “Privacy” or “Security” and find the option related to encryption. Disable the feature by toggling it off or selecting “None.” Keep in mind that the steps may vary based on the app you’re using, and some apps might not allow disabling encryption.
Introduction to Disable End-to-end Encryption on Android
Disabling end-to-end encryption on an Android device might be necessary for troubleshooting, compliance with specific workplace policies, or simply for preference. End-to-end encryption is a security feature that encrypts messages so only the sender and receiver can read them. However, in some cases, you might need to turn this feature off.
Understanding End-to-End Encryption
End-to-end encryption (E2EE) is a secure communication method where only the communicating users can read the messages. By encrypting the data at the sender’s device and decrypting it only at the receiver’s end, E2EE ensures that intermediaries, such as Internet providers or application servers, cannot access the plain text information.
Assessing the Need to Disable E2EE
Assessing the need to disable end-to-end encryption (E2EE) involves weighing privacy against accessibility. While E2EE offers strong protection against data interception, certain situations, such as organizational compliance, legal requirements, or specific troubleshooting scenarios, might necessitate access to unencrypted data.
Backing Up Important Data
Backing up important data is crucial for safeguarding against data loss due to hardware failure, software issues, or accidental deletion. Regular backups can be performed using cloud services, external hard drives, or USB sticks, ensuring multiple copies are stored in different locations. Automate the backup process where possible to maintain up-to-date copies of your files.
Identifying Apps with Encryption Settings
Identifying apps with encryption settings involves reviewing the security features of each application. Most messaging and data storage apps offer encryption settings, typically found under the ‘Security’ or ‘Privacy’ sections in the settings menu. Popular apps like WhatsApp, Signal, and Telegram provide end-to-end encryption by default. Email clients and cloud storage services also often include encryption options that can be customized to enhance data protection.
Modifying App Encryption Settings
Modifying app encryption settings generally involves accessing the app’s security or privacy settings. For messaging apps like WhatsApp or Signal, encryption is enabled by default and cannot be turned off. However, for other apps, particularly cloud storage or email services, you may find options to adjust encryption levels under their respective settings menus.
Exploring Alternative Communication Methods
Exploring alternative communication methods can enhance or replace traditional methods, depending on your needs. Options include secure messaging apps like Signal, which prioritizes privacy with end-to-end encryption, or enterprise solutions like Slack for collaborative work environments. For more direct communication, VoIP services like Skype or Zoom can be useful.
Regularly Reviewing Security Measures
Regularly reviewing security measures is essential to maintaining data integrity and protecting against emerging threats. This involves updating software to patch vulnerabilities, auditing access controls, and reinforcing user authentication methods. Regular security training for users can also help mitigate risks.
Security Implications
Security implications are significant considerations in any digital environment. Weaknesses in security protocols can lead to data breaches, identity theft, and unauthorized access. Implementing robust security measures like strong encryption, multi-factor authentication, and regular software updates is critical. Additionally, user awareness and compliance are essential to protect sensitive information.
Frequently Asked Questions
Can I disable end-to-end encryption on Android?
Disabling end-to-end encryption on Android depends on the specific app you are using. Android itself does not have a built-in feature to disable encryption universally across all applications.
How can I disable encryption on WhatsApp?
WhatsApp does not provide an option to disable end-to-end encryption for its messages or calls. This feature is built into the app to ensure user privacy and security.
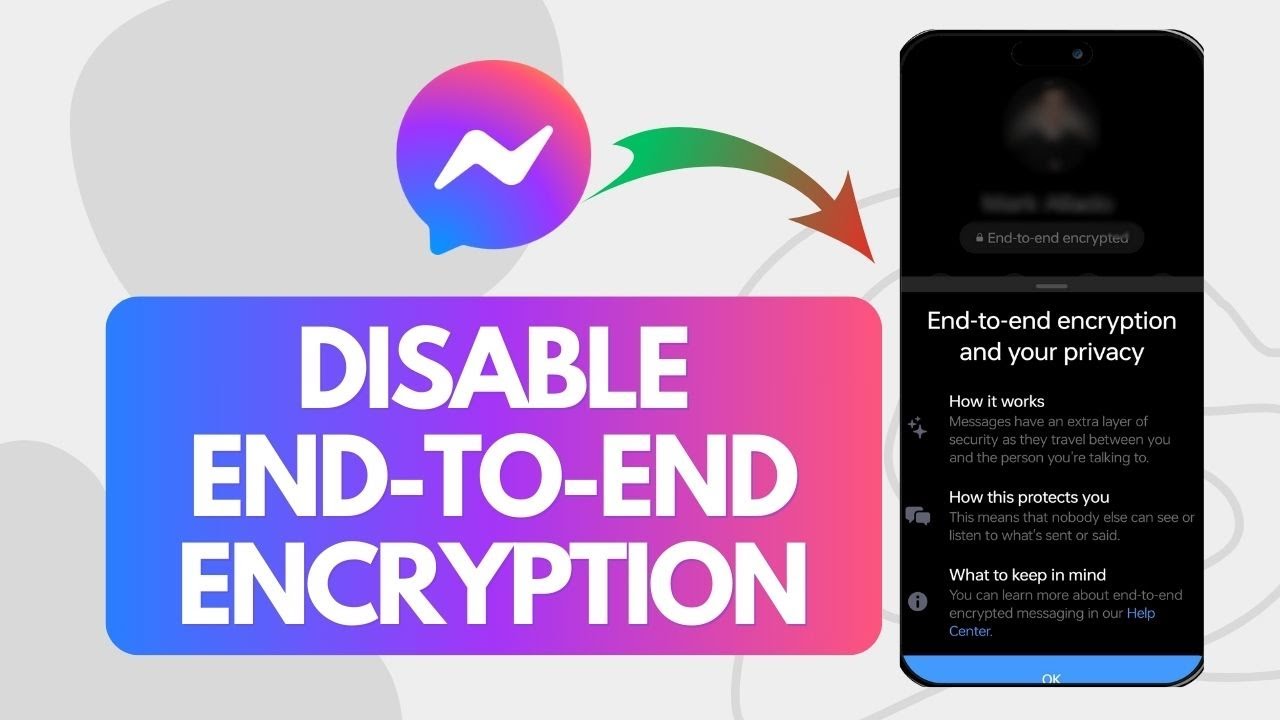
Is it possible to turn off encryption in Facebook Messenger?
You can disable end-to-end encryption in Facebook Messenger by not using its “Secret Conversations” feature. Regular chats in Messenger are not end-to-end encrypted by default.
Can I disable encryption in Telegram?
In Telegram, standard chats are not end-to-end encrypted. However, if you use the “Secret Chat” feature, those conversations are encrypted. To avoid end-to-end encryption, simply use regular chats instead of secret chats.
Does Signal allow for encryption to be disabled?
Signal does not provide an option to disable end-to-end encryption. The app is designed to offer secure, private communication with encryption always enabled.
What about emails on Android? Can encryption be disabled?
If you’re using email encryption through technologies like S/MIME or PGP, you typically have the option to send emails without encryption. Check your email app’s settings to manage these options.
Why is it not recommended to disable encryption?
Disabling encryption reduces the security of your communications, making them more susceptible to interception and eavesdropping. Encryption is crucial for protecting your data and privacy.
Are there any apps that allow disabling encryption?
Few mainstream apps allow disabling end-to-end encryption due to the growing importance of digital security. However, some apps might offer flexible options for encryption, especially those designed for enterprise or specialized environments.
What should I do if I need unencrypted communication?
If you require unencrypted communication for a specific purpose, consider using apps that do not offer end-to-end encryption by default or platforms that allow you to toggle encryption settings per your needs.
How do I find out if an app uses encryption?
Check the app’s description in the Google Play Store or the app’s official website, or consult the app’s settings. Many apps also provide FAQs and customer support that can clarify their encryption practices.
Conclusion
Disabling end-to-end encryption on Android devices largely depends on the specific applications you are using. While apps like WhatsApp, Signal, and Telegram’s secret chats do not offer an option to disable encryption, due to their inherent design to safeguard privacy and security, other apps like Facebook Messenger provide flexibility in their encryption settings.
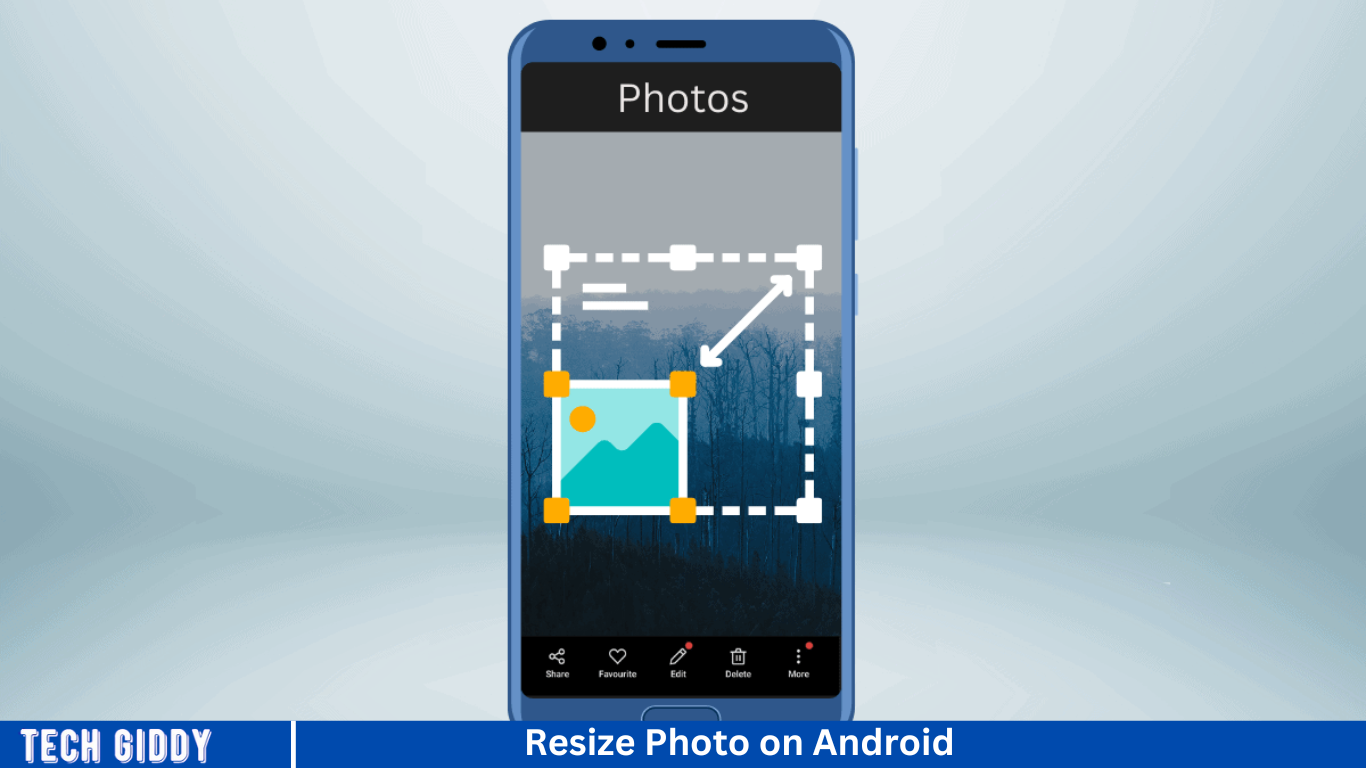
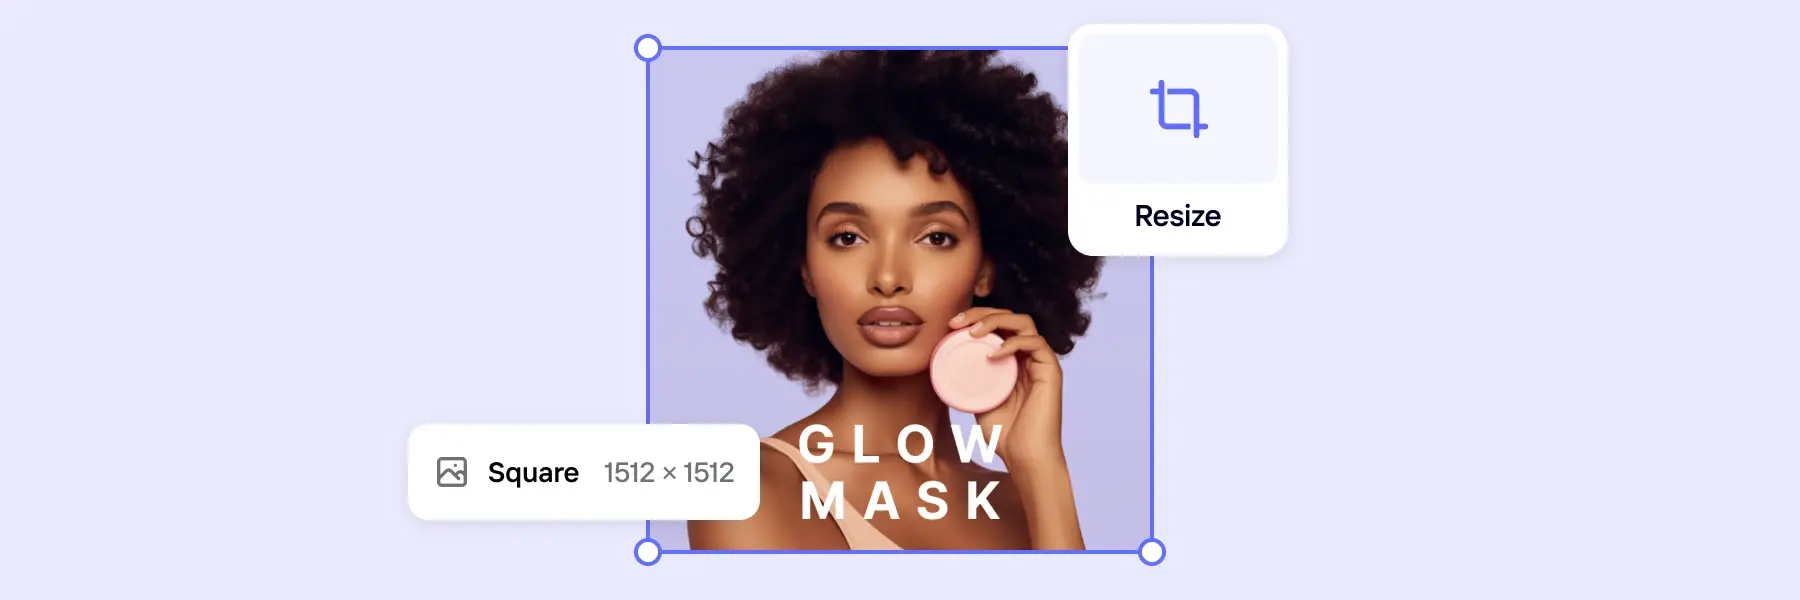
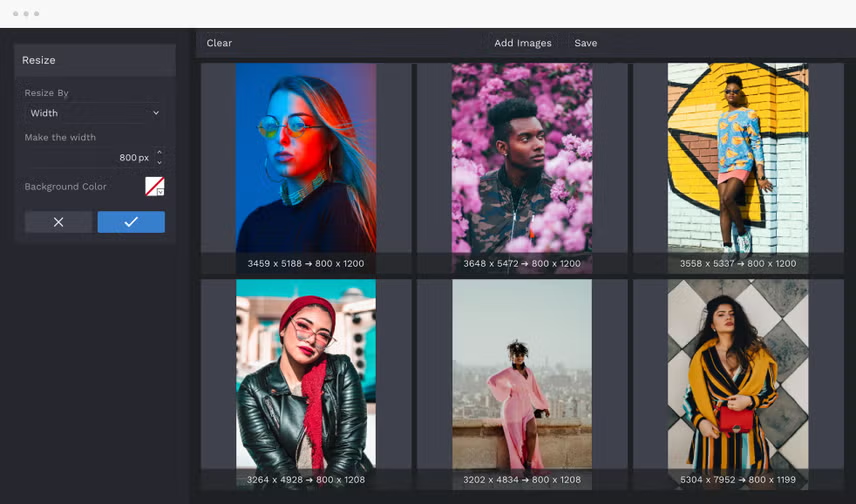
Resizing photos on your Android device can be a useful skill to have, whether you want to save storage space, share images more efficiently, or meet specific size requirements for uploading to social media or websites. In this comprehensive guide, we’ll explore various methods and tools available for resizing photos on Android devices, from built-in features to third-party apps. Whether you’re a novice or a seasoned Android user, you’ll find step-by-step instructions and tips to help you resize your photos effortlessly.
Introduction to Resize Photo
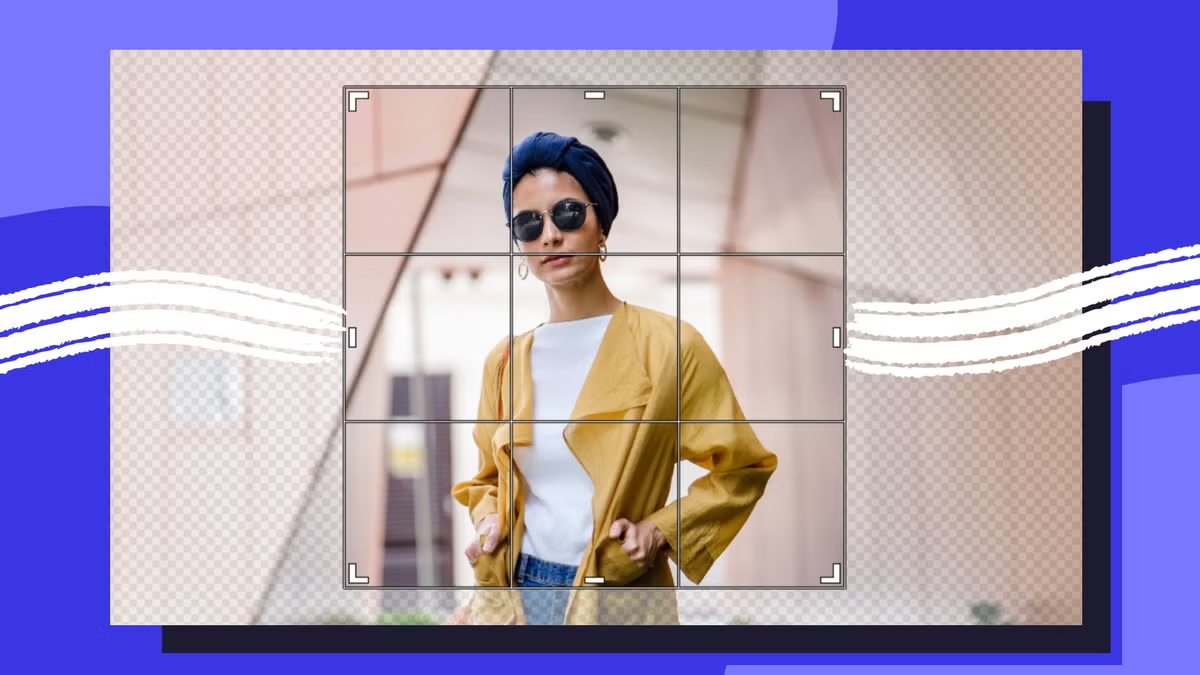
Learn to resize photos on your Android device effortlessly. Access your gallery, select the image, and open it for editing. Look for the resize option, where you can adjust dimensions and maintain the aspect ratio if needed. Confirm your changes and save the resized photo. It’s a simple process that allows you to tailor images to your specifications with ease. Perfect for sharing, uploading, or optimizing storage space on your device.
Understanding Photo Resolution and Size
Before diving into resizing methods, it’s essential to understand the concepts of photo resolution and size. Resolution refers to the amount of detail in an image, typically measured in pixels per inch (PPI) or dots per inch (DPI). Size, on the other hand, refers to the dimensions of an image, usually expressed in pixels (e.g., 1920×1080). Resizing a photo involves adjusting its dimensions while potentially altering its resolution and file size.
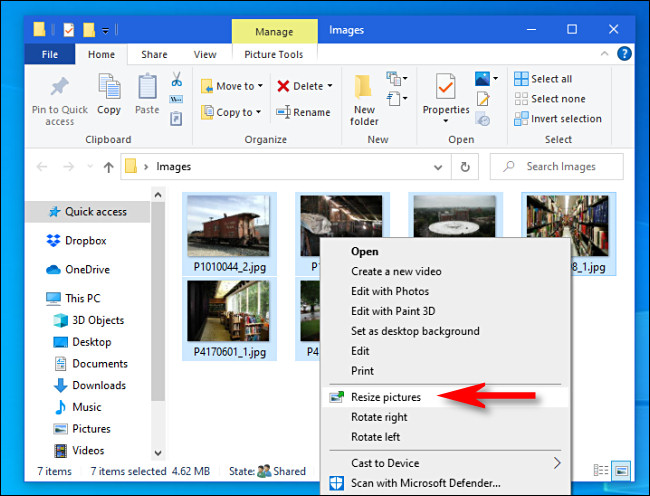
Built-in Tools for Resizing Photos
Many Android devices come with built-in tools or features for editing photos, including resizing options. These tools are often found within the default gallery or photo management app. We’ll explore how to access and use these built-in tools to resize photos directly on your Android device without the need for additional apps.
Using Third-Party Photo Editing Apps
While built-in tools are convenient, they may lack advanced features or customization options for resizing photos. Third-party photo editing apps offer a wide range of tools and effects, including precise resizing capabilities. We’ll introduce popular photo editing apps available on the Google Play Store and demonstrate how to use them to resize photos effectively.
Batch Resizing Multiple Photos
If you need to resize multiple photos simultaneously, manually editing each one can be time-consuming. Batch resizing allows you to resize multiple photos at once, saving you time and effort. We’ll discuss how to batch-resize photos using both built-in tools and third-party apps, streamlining the process of handling large photo collections.
Maintaining Photo Quality During Resizing
Resizing a photo can sometimes result in a loss of image quality, particularly if you’re reducing its size significantly. However, there are techniques and settings you can adjust to minimize quality loss during resizing. We’ll provide tips and best practices for maintaining optimal photo quality while resizing images on your Android device.
Resizing Photos for Specific Purposes
Different scenarios may require photos to meet specific size requirements, such as social media profile pictures, website banners, or printing purposes. We’ll explore how to resize photos to fit these various purposes, including recommended dimensions and aspect ratios for common use cases.
Resizing Photos Without Losing Exif Data
Exif (Exchangeable Image File Format) data contains valuable information about a photo, including camera settings, date and time of capture, and geolocation. When resizing photos, it’s essential to preserve this metadata whenever possible. We’ll discuss methods for resizing photos without losing Exif data, ensuring that valuable information remains intact.
Sharing Resized Photos
Resize your photos to the desired dimensions, you’ll likely want to share them with others or use them in various contexts. We’ll cover different methods for sharing resized photos, including email, messaging apps, cloud storage services, and social media platforms.
Automating Photo Resizing Tasks
Resize photos for specific purposes, automating the process can save you even more time. We’ll explore automation tools and scripts that allow you to resize photos automatically based on predefined settings or criteria, making photo management more efficient.

Troubleshooting Common Issues
Despite following the resizing instructions, you may encounter common issues or challenges along the way. From unexpected changes in photo quality to compatibility issues with certain apps, we’ll address common troubleshooting scenarios and provide solutions to help you overcome them effectively.
Frequently Asked Questions
How do I resize a photo on Android?
You can resize a photo on Android using built-in tools in the gallery app or by using third-party photo editing apps available on the Google Play Store.
Can I resize multiple photos at once on Android?
Yes, you can resize multiple photos simultaneously using batch resizing features available in some gallery apps or third-party photo editing apps.
Will resizing a photo reduce its quality?
Resizing a photo can potentially reduce its quality, especially if you’re decreasing its dimensions significantly. However, you can minimize quality loss by using appropriate resizing techniques and settings.
What are the recommended dimensions for resizing photos for social media?
Each social media platform has its own recommended dimensions for profile pictures, cover photos, and post images. Refer to the platform’s guidelines for the most up-to-date recommendations.
How can I resize a photo without losing its Exif data?
Some photo editing apps offer options to preserve Exif data during the resizing process. Look for these features when selecting an app for resizing photos on Android.
Are there any free apps for resizing photos on Android?
Yes, many free photo editing apps on the Google Play Store offer resizing features. Explore options like Snapseed, Adobe Photoshop Express, or Pixlr for resizing photos at no cost.
Can I resize photos offline on Android?
Yes, you can resize photos offline using built-in tools in the gallery app or by downloading third-party photo editing apps that offer offline functionality.
How can I ensure that resized photos maintain their aspect ratio?
Most photo editing apps allow you to maintain the aspect ratio of a photo while resizing by locking the aspect ratio or selecting a predefined aspect ratio option.
Will resizing a photo affect its file format?
Resizing a photo typically doesn’t change its file format. However, some advanced editing features in certain apps may allow you to convert the file format during the resizing process.
Can I undo changes after resizing a photo?
Many photo editing apps include an undo feature that allows you to revert changes, including resizing if you’re not satisfied with the results. Look for the undo button or gesture within the app’s interface.
Conclusion
Resizing photos on Android devices offers a versatile solution for various purposes, from conserving storage space to meeting specific size requirements for social media, websites, or printing. Throughout this guide, we’ve explored different methods and tools available for resizing photos on Android, including built-in features in gallery apps and third-party photo editing apps from the Google Play Store.
Add a contacts shortcut to your Android home screen, navigate to your contacts app, find the contact you want to add, tap and hold on their name until a menu appears, then select “Add to Home screen” or “Create shortcut.” The contact shortcut will then appear on your home screen, allowing you to quickly access and call or message that contact with a single tap.
Introduction to Contacts Shortcut to Android Home Screen
Your Android device offers a multitude of features to enhance productivity and convenience, including the ability to add shortcuts to frequently accessed contacts directly to your home screen. This guide provides a step-by-step walkthrough to help you effortlessly create and customize contact shortcuts on your Android device, ensuring quick and easy access to your most important contacts.
Understanding Contacts Shortcuts
Contacts shortcuts are convenient links that allow you to directly call, message, or email a specific contact without navigating through your contacts list or dialer app. By adding these shortcuts to your home screen, you can streamline communication and save valuable time accessing your favorite contacts.
Accessing Contacts on Android
Before adding contact shortcuts to your home screen, it’s essential to familiarize yourself with accessing and managing contacts on your Android device. Typically, contacts are stored in the Contacts or People app, where you can view, edit, and organize your contacts list. Additionally, many Android devices offer integration with cloud services like Google Contacts, ensuring seamless synchronization across devices.
Creating Contacts Shortcuts
To add a contacts shortcut to your Android home screen, follow these simple steps:
- Open the Contacts or People app on your Android device.
- Locate the contact you want to add to your home screen.
- Long-press on the contact’s name or profile picture to select it.
- A menu will appear with various options. Select “Add to Home screen” or “Create shortcut,” depending on your device’s interface.
- Follow the prompts to customize the shortcut’s name and icon if desired.
- Once configured, tap “Add” or “Done” to add the shortcut to your home screen.
Customizing Contacts Shortcuts
Android offers flexibility in customizing contact shortcuts to suit your preferences and workflow. Here are some customization options you can explore:
- Rename the Shortcut: Edit the shortcut’s name to make it more descriptive or recognizable.
- Choose an Icon: Select a custom icon for the shortcut to differentiate it from other icons on your home screen.
- Add Multiple Shortcuts: You can create shortcuts for multiple contacts and organize them into groups or folders on your home screen.
- Resize and Rearrange: Android home screens typically allow you to resize and rearrange shortcuts, giving you full control over their placement and appearance.
Managing Contacts Shortcuts
Here are some tips for managing contacts shortcuts on Android:
- Deleting Shortcuts: To remove a contacts shortcut from your home screen, long-press on the shortcut until a menu appears, then select “Remove” or “Delete.”
- Updating Shortcuts: If a contact’s information changes, you can update the corresponding shortcut by editing it from the Contacts or People app.
- Organizing Shortcuts: Organize contacts shortcuts into folders or groups on your home screen to streamline access and declutter your interface.
- Backing Up Contacts: Regularly backup your contacts to ensure you don’t lose any important information, especially if you rely heavily on contacts shortcuts for communication.
Best Practices for Using Contact Shortcuts
To make the most of contacts shortcuts on your Android device, consider the following best practices:
- Prioritize Frequently Used Contacts: Add shortcuts for contacts you communicate with regularly to maximize efficiency.
- Keep Shortcuts Organized: Organize contacts shortcuts logically to avoid cluttering your home screen and ensure easy access.
- Update Contact Information: Periodically review and update contact information to ensure accuracy and relevance.
- Backup Contacts Regularly: Backup your contacts regularly to prevent data loss and ensure seamless synchronization across devices.
Frequently Asked Questions
How do I add a contacts shortcut to my Android home screen?
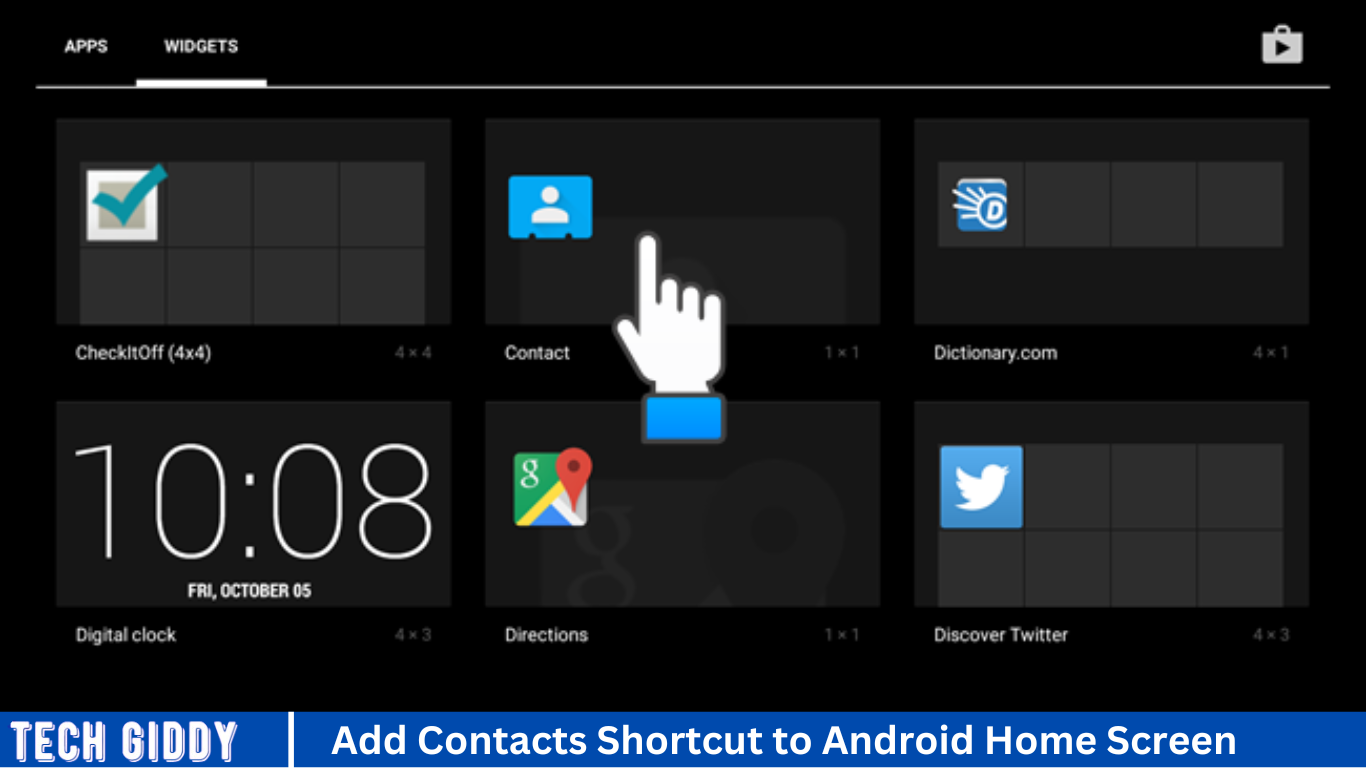
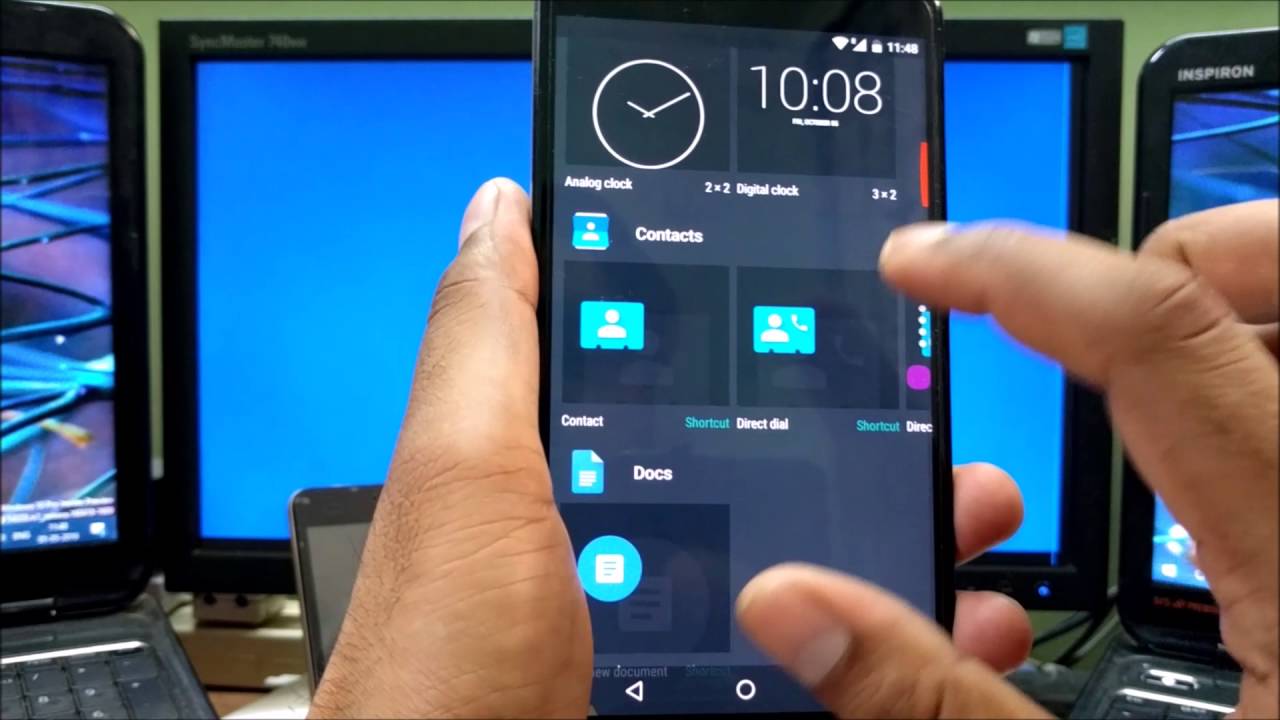
To add a contacts shortcut, long-press on an empty area of your home screen, select “Widgets,” scroll through the widgets to find the Contacts or Direct Dial widget, then drag it to your home screen and select the contact you want to add.
Can I create shortcuts for specific contacts on Android?
Yes, Android allows you to create shortcuts for specific contacts, making it convenient to call or message them directly from your home screen.
What steps do I follow to add a contact to my home screen?
Long-press on a space on your home screen, select “Widgets,” find the Contacts or Direct Dial widget, drag it to your home screen, and then choose the contact you want to add.
Is it possible to customize the appearance of the contact shortcut?
Some Android launchers or widgets may allow for customization of the contact shortcut appearance, such as the size or style of the widget.
How many contacts shortcuts can I add to my home screen?
You can add multiple contact shortcuts to your home screen, limited only by the available space on your screen.
Can I remove a contacts shortcut from my home screen?
Yes, you can remove a contacts shortcut from your home screen by long-pressing on it and dragging it to the “Remove” or “Delete” option at the top or bottom of the screen, depending on your device.
Will adding a contacts shortcut affect my phone’s performance?
Adding contacts shortcuts should not significantly affect your phone’s performance, as they are lightweight widgets designed for quick access to contacts.
Does the contacts shortcut update automatically if the contact’s information changes?
The contacts shortcut should update automatically if the contact’s information changes, ensuring that you always have the most up-to-date information.
Can I rearrange the position of contact shortcuts on my home screen?
Yes, you can rearrange the position of contact shortcuts on your home screen by long-pressing them and dragging them to the desired location.
Are there alternative methods to quickly access contacts on Android?
Yes, besides adding contacts shortcuts to your home screen, you can also access your contacts through the Contacts app, the Phone app, or by using voice commands with Google Assistant.
Conclusion
Adding contact shortcuts to your Android home screen provides a convenient way to quickly access and communicate with specific contacts. By following simple steps, users can customize their home screen with direct dial or messaging shortcuts for their frequently contacted individuals. These shortcuts offer efficient communication and streamline the user experience without significantly impacting device performance.
Looping a YouTube video on an Android device is a straightforward process that can be achieved using various methods, including built-in YouTube features, third-party apps, or browser extensions. In this guide, we’ll explore different ways to loop a YouTube video on an Android device, step by step, providing detailed instructions for each method.
Introduction to Looping YouTube Videos on Android
YouTube videos on Android, first, open the YouTube app and select the video you want to loop. Then, tap the three dots icon next to the video and choose “Loop” from the menu. This will continuously repeat the video until you manually stop it. Alternatively, you can use third-party apps like “Loop YouTube Videos” from the Play Store, which offer additional customization options for looping videos.

Launch the YouTube App or Access the YouTube Website
YouTube on Android, launch the YouTube app from your device’s home screen or app drawer. Alternatively, open a web browser on your Android device and navigate to the YouTube website by typing “youtube.com” in the address bar. Once on the YouTube homepage, you can search for videos, browse recommended content, or access your subscriptions. Ensure you have a stable internet connection for smooth playback.
Search and Select the Desired Video
For specific videos on YouTube, open the YouTube app or website on your device. Then, use the search bar at the top of the screen to type in keywords related to the video you’re looking for. After entering your search query, scroll through the results and tap on the desired video to select it. The video will then start playing automatically for you to enjoy.
Open the Video Playback Controls
To access video playback controls on YouTube, simply tap on the video while it’s playing. This action will bring up the playback controls overlay, which includes options like play/pause, volume adjustment, timeline scrubbing, and fullscreen mode. You can also tap on the screen again to hide the controls. These controls provide convenient ways to manage your viewing experience and interact with the video content seamlessly.
Locate and Tap on the Loop Icon
Looping for a YouTube video, tap on the screen while the video is playing to reveal the playback controls. Next, locate the loop icon, typically represented by two curved arrows forming a circle. It’s usually situated among the playback control options. Tap on this loop icon to activate looping for the current video. Once enabled, the video will continuously repeat until you manually turn off the loop feature.
Adjust Loop Settings (if Available)
Loop settings are available, access them within the app or browser extension. Adjust loop preferences such as loop count or loop range if applicable. For example, you may specify whether the entire video or only a portion should loop. Confirm changes and proceed with playback to ensure the video loops are according to the configured settings for a tailored viewing experience.
Start Playback of the VideoVerify the Video is Looping Properly
After selecting the desired video on the YouTube app, start playback. If using a third-party looping app, initiate playback within the app interface. Ensure the video plays smoothly without interruptions. Verify looping functionality by observing the video replaying seamlessly once it reaches the end. If looping is not enabled, access the loop option again and ensure it is activated for continuous playback.
Frequently Asked Questions
How do I loop a YouTube video on my Android device?
Open the YouTube app, play the video you want to do, and tap the loop icon (two curved arrows forming a circle) among the playback controls.
Can I loop a video on the YouTube website using my Android device?
Yes, you can loop a video on the YouTube website using the loop icon just like in the app.
Are there any third-party apps for looping YouTube videos on Android?
Yes, there are third-party apps available on the Play Store like “Loop YouTube Videos” that offer looping functionality.
Can I adjust the loop settings on the YouTube app?
The YouTube app generally offers a basic loop feature. For more advanced loop settings, consider using third-party apps.
How do I turn off loop mode on the YouTube app?
Tap the loop icon again to disable loop mode while the video is playing.
Is it possible to loop only a specific portion of a YouTube video on Android?
Some third-party apps may offer this feature, allowing you to select a specific portion of the video to loop.
Will looping a YouTube video consume more data on my Android device?
Looping a video doesn’t increase data usage as the video is already loaded once.
Can I loop a playlist of videos on the YouTube app?
Currently, looping is only available for individual videos, not entire playlists.
Does looping a video affect my YouTube viewing history?
Looping a video doesn’t affect your viewing history on YouTube.
Are there any legal restrictions on looping YouTube videos?
Looping videos on YouTube is generally allowed as long as it complies with YouTube’s terms of service and copyright policies.
Conclusion
Looping YouTube videos on your Android device is a straightforward process using either the YouTube app or the website. You can access the loop feature directly from the playback controls, ensuring your favorite videos repeat seamlessly. While basic looping is available within the YouTube app, third-party apps offer additional customization options for looping preferences. Enjoy uninterrupted playback of your preferred content with ease on your Android device.

Buffalo Milk: Benefits and Nutritional Value
Resize Photo on Android
Add Contacts Shortcut to Android Home Screen
Loop a YouTube Video on Android Device
12 Ways to Transfer Photos from Phone to Laptop Without USB Cable

Unveiling the Mystery: What You Need to Know About 02045996879
1337x Proxy List: New Websites in 2024
KickassTorrents — New Websites in 2024 (100% Working)
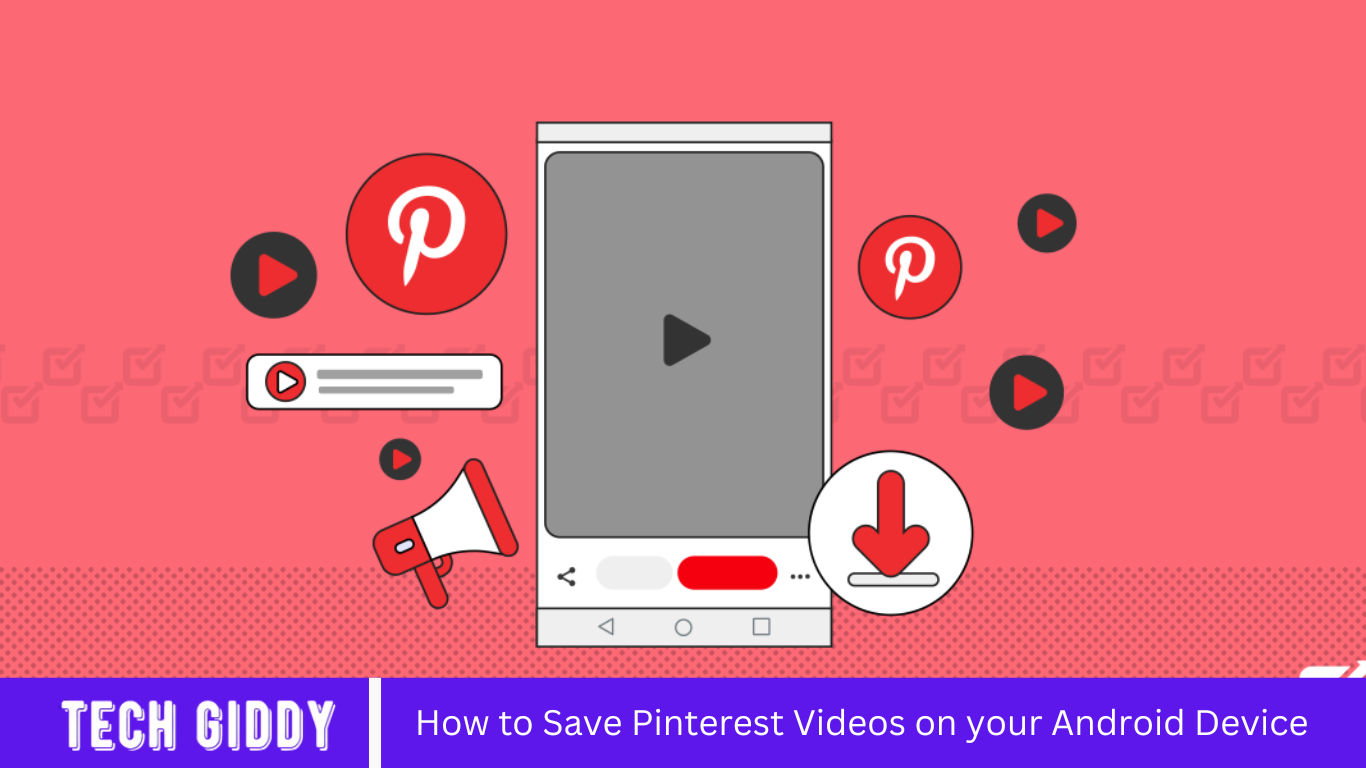
How to Save Pinterest Videos on your Android Device
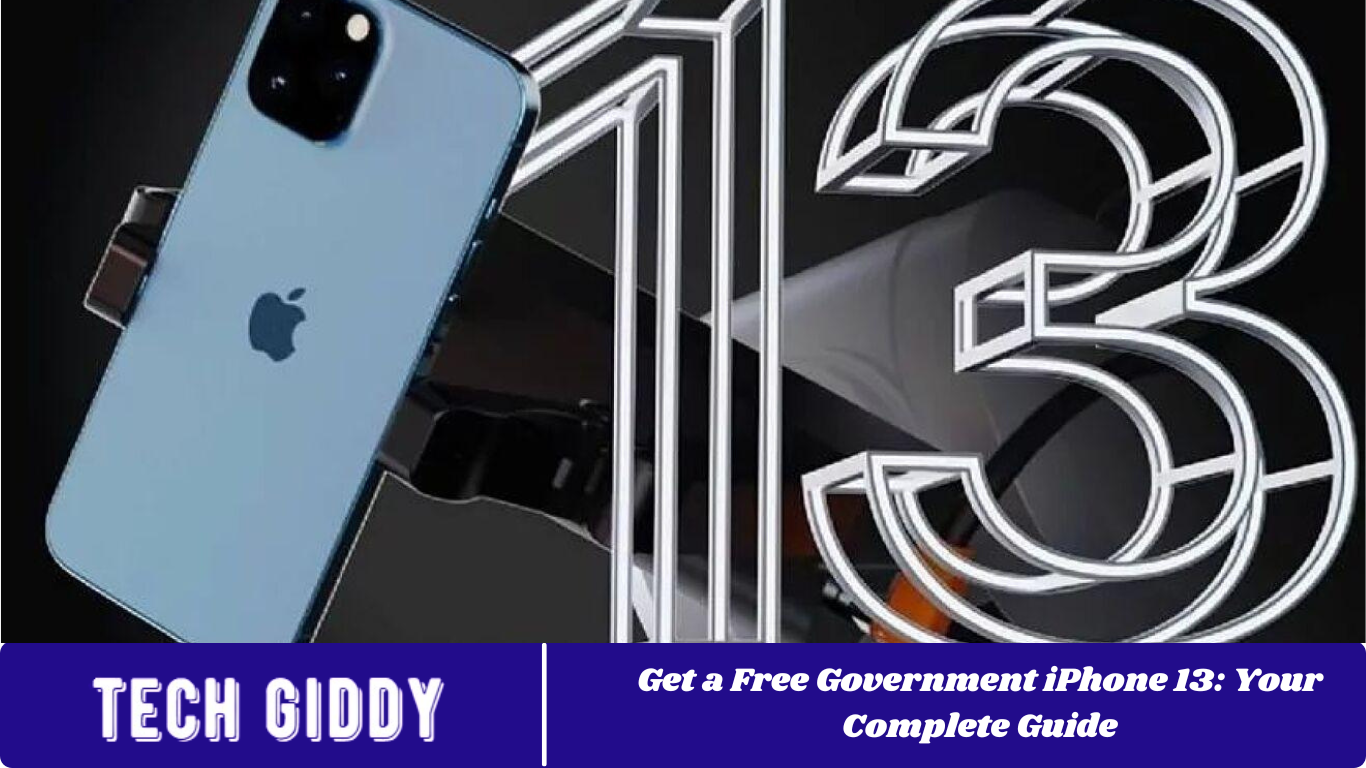
Get a Free Government iPhone 13: Your Complete Guide
-
 Entertainment5 months ago
Unveiling the Mystery: What You Need to Know About 02045996879
-
 Entertainment5 months ago
1337x Proxy List: New Websites in 2024
-
 Entertainment5 months ago
KickassTorrents — New Websites in 2024 (100% Working)
-
 How to4 months ago
How to Save Pinterest Videos on your Android Device
-
 News4 months ago
Get a Free Government iPhone 13: Your Complete Guide
-
 How to4 months ago
Repair PST File: Avoid ScanPST
-
 Blog6 months ago
The Epitome of Elegance: Unveiling the Gold Apple Watch Series 9
-
 How to4 months ago
Add Pronouns to Email Sig